Beginner Guide
This guide was originally written by Zeta Ghost and Flash Combo, two veteran players of both Ragnarok Online and LeikaRO.
The Basics
Ragnarok Online is a Massively Multiplayer Online Role Playing Game (MMORPG). It was created by the Gravity Corporation based in Seoul, South Korea. Ragnarok Online (RO) allows you to create a virtual character, customize it, and partake in epic adventures across exotic lands. RO is a great way to hang out with friends as well as make new ones. With an ever-expanding universe, in-game events, and a large community of users, there are always places to see, things to do, and people to meet in the world of Ragnarok!
Due to this server being private, the rates are slightly increased to 15/15/10, this means the "Base" experience is 15x regular rates, "Job" experience is 15x regular rates and the "Item Drop" rates are 10x the regular rates on official servers, to make this game slightly less grind heavy than the usual.
Character Creation
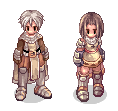
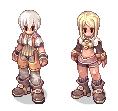
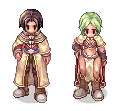
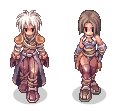
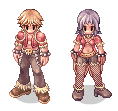
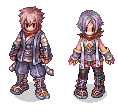
Creating a character in RO is an easy process. Choosing an empty character slot, you can create a new character with a range of options for hair colors and hairstyles. The initial set of options available is small, but the Stylist NPC found in all major towns can change your clothing color, hair color, and hairstyle for free. Your character's gender is determined by the gender you chose when you created your server account. You then can name your character. Names must contain only letters or numbers. If a character is found with an offensive name, they will be asked to change their name immediately. All other features, such as clothing style, depend on the character's Job, to help players identify others' classes more easily.
In RO, a character's gender will determine what Jobs are available to them as well as some specific skills and features. For example, only males can become Bards or Kagerou while only females can become Dancers and Oboro. In addition, getting married gives you a few new skills, such as being able to summon your spouse to your side.
Interface
Here I will give you a screen shot of the majority of controls you will be using, and certainly no more at the basic level.
Ok let's start from the top! On the top left hand side, your name is displayed followed by your Job. I am Zeta Ghost, a Warlock. The HP and SP is displayed and the percentage of health. underneath shows my level and the percentage through that level i am, 167 in this image, max level being 175/60. You can scroll over the blue bar to see how far to the next level you are to the first decimal place e.g. 50.5% exp, so 49.5% to go. Your Job level is placed below your base level. Under all this is the your maximum weight limit and how much of that weight limit you are using. If you reach 50% or 90%, where the buffs are shown (ill get to that in a moment) a graphic is displayed, clearly telling you that you are over the weight limit. The chat bar will also tell you this. Finally, the total amount of zeny on this character is shown. Under all this is an easy access variety of selections to bring up a multiple screens, like your inventory and guild log. I recommend you get used to the hot keys however as it is simply faster. To minimize and maximize this whole section, please hold down Alt + V. All information is then hidden bar your name, HP, SP, Base level, Job level and EXP.
Next below all this, is the Equipment, costume and Status section. To access it please hold down Alt + Q. From the top left, is your headgear, below is the lower headgear, below is the Weapon, below is the garment, below is the first accessory slot. On the top right, is the middle headgear, the armor, the Shield, two-handed weapon second slot (it takes up both slots) or for select Jobs, another weapon slot. Below is the Shoes and below that is the final Accessory slot. Now as you may have noticed, two things, one the only customization visible is my head, this is because within Ragnarok online, only the headgear can be changed. This is called a costume, it will disguise your actual headgear and display one of your choice instead. You must make them in game for 500k each on this server. Below all of this are the status, now under status points you can see how many i may use, you get given some per level. After 9 or so points are put into a stat, the requirement is increased. The requirements are shown next to the arrows. E.G. STR |1 +1 |>| 2 | The 1 shows my current stat, +1 shows bonuses from buffs and equipment and the 2 shows how many status points it consume to increase it by 1. The "Show Equip" tab when ticked will allow others to see your equipment.
Moving on, under this shows the chat bar, press enter to reveal it, and enter again to hide it, to click the Red X in the top right hand corner of the chat area to reveal it (its tiny and easy to miss). You can open new tabs by pressing the "+" and close them with the "-", You can also name them by clicking on the "NewTab" and renaming them like you would a folder on your desktop. You will see a lock at the end, doing this means nothing about your chat will change. The circle opens up the chat options, allowing you to show and hide certain information such as guild chat and battle information.
- Your General public chat shows in Green.
- Others General public chat shows in White.
- Private messages show in Yellow.
- Party messages are Orange.
- Guild messages are light Green.
- "#main" messages are Cream.
- Announcements show in Red.
- Admin and GMs announce in Yellow and at the top of the screen.
- In the chat there are 2 bars, the first bar is to select an address to where your message *should be sent, whether a specific person or something more general like main chat.
- To PM someone it would be like |Someone Else| |Hi |.
- To talk in main chat |#main| |Hello Everyone |
- To join a channel |#main| |@join #main |
At the top left you will see many empty boxes and boxes with pictures. These are Hot keys. Press F12 to access the hot keys. You will need to edit them yourself but it couldn't be simpler. Just press "esc" and click short cuts, then simply assign the keys you would like. Some laptops use F12 for things like the internet, so you will need to use the function button, known as "fn" on you keyboard + F12 to access it. Simply put, press the key will activate the assigned skill. Its much quicker than normal use. Just select the skill you already have (U must have the skill), then drag it to the slot you want. You can also assign consumables and equipment to the hotkeys but no Miscs (non-usable items).
Below the hotkeys are the emotions, simply for fun you can have you character display these by clicking on them, and pressing enter into the chat bar. They all have assigned shortcuts, the Happy is "/ heh" is /heh, Ok is "/ ok" /ok and thumbs up is "/ no1" /no1, just type them in and its displayed. /sit to sit down, "/ omg" is /omg , /doridori and /bingbing are fun ones too. Alt + L brings this up.
In the bottom middle, the guild I'm in is shown. I am apart of the Reviled guild. The guild level is displayed and all of our allies & antagonists. The castles we own, the guild master/leader, average guild member level and how many are online is also shown. The other tabs show individual members, the guild "skills", the announcements and who has been kicked and why, those who leave on their own don't display a reason. Alt + G brings it up.
OK back to the top, by pressing Alt + M another short cut screen is displayed. This shows anything from Alt + 1 to Alt + 0 on the keyboard. Just assign any keyboard inputs you want displayed like a word or a command and this short cut will do it. You can change the key bindings by pressing "Esc" and going to the short cut settings.
Next to it, press Alt + U to bring up the quest log. This will show information on each quest, the cool down timers, NPC's, Items, and monsters required for both active (quests you are doing) and passive (quests you may have put aside) quests. By right clicking a quest it will place it into the inactive section of the interface. You can show the quests by clicking on them, and it will tell you the quest information.
Next to the right, is the Inventory, accessed by Alt + E. The first tab is consumables like white and blue potions. The second is equipment and third are non-usable items. The forth tab is the private or "favourite" tab, best to use this for special items which cant be dropped/stored, or putting your favorite gear in there. Anything can be stored here. The Drop lock stops you from accidentally dropping items when using them. Click and drag out of the box with the equipment tab closed to drop an item.
To the right again is the map. When talking to guides in various cities notable points on the map are highlighted. The map can be made transparent or zoomed in and out. Ctrl + ' and then Tab brings up a much larger map of the world, where the locations and various monsters can be found. A feature called navigation can be used to create a trail to allow you to locate various maps or NPC's. This can be found by pressing Ctrl + v and clicking "Navigation".
Below this is the chat window options, it shows what's being displayed (ON) and what isn't (off). You may display Exp or Item's dropped if you like using this window. Press the little. I can be accessed by clicking the circle button at the top right of the chat box.
Next to it (on the right) you will see a strange green box, in a vertical line from this, all buffs/debuffs and over limit signs are shown. This green box is my Warlocks "Energy Coat" ability, scrolling over it will show by the second how long it has left before it ends.
Under this is the skill tree, sorted into first, second, third and Misc tree. All straight forward, first is First Job skills, second is Second Job and transcendent, third is Third Job. Misc includes skills learnt through equipping an item. Passive skills cannot be clicked on or moved to the hotkey bar as they are always on. Alt + S to access.
On the far left is the "Party" menu and friends list, Alt + Z to access. This shows all of the members within a party and their HP while they are within view range. You can use supportive skills directly to a member of the party by using the skill on their name if they are within its parameters. 12 people can be within one party on this server. You must be within 30 levels of each other to share exp from the kills, but no limit to share item drops. After 3 people are in a party, the exp split from monsters is increased as to gain advantage from partying instead of a disadvantage. The other tab is the friends list. The limit is 40 people, and it only displays if they are on or offline. Here there is a tab called friend setup, untick the boxes if you want your pm's to go directly into your chat box and not an exterior box.
Finally - (the bits i missed) Scrolling over my name shows my "Name" "Party Name" under shows "Guild" "Title within guild". Right clicking equipment will show any enchantments with multicolored orbs or crystals and will show you if it has a slot or a card equipped to that slot. Right clicking them will show you the effect of the equipped card and clicking "show" will show you a picture associated to the card of the monster in-case you don't know the name of said monster.
By pressing "Esc" you can change the key bindings, sounds, skins, video settings, and exiting the game.
Gameplay & Mechanics
RO is a point-and-click style game, and almost all interactions in the game occur through mouse clicks. This includes using skills in combat, interacting with NPCs, and more. All of the maps are made of "cells", like a grid system. Every space, including the ground, is considered a cell, usually noted by a green border that appears around the specific cell when you hover your mouse over it. If you hover over a spot on the map and a border does not appear, that means that that cell is un-targetable and you cannot enter that cell or use it for skills.
Skills
Skills can be broken up into two main categories: Active and Passive. Active skills include offensive skills, such as Cold Bolt, and supportive skills, such as Heal and Aura Blade. Like the name implies, the user must "actively" choose to use skills. Conversely, Passive skills are skills that are always in effect, whether the player intends them to be or not. This includes skills like Increase Recuperative Power or Katar Mastery.
All Active skills must be used on a specific target, unless they are designated as "ground-targeting" skills, meaning that the user targets a specific location on the ground instead of a specific target such as a monster or another player. Some skills are single target while others are Area of Effect skills, which means they affect a specific range of cells instead of a single cell as described in the skill's information.
Items and Weight Limit
Players often wonder how many items they can carry at once in their inventory. In RO, a player's carrying capacity is determined by their Weight Limit. Every item in the game has a set Weight, which can be viewed in the item's details by right clicking on the item in the inventory, shops, or bank menus. Players can continue to pick up items up until they reach 90% of their Weight Limit.
Weight Limit does not affect just the player's inventory capacity, though. It also affects general abilities. If a player is at 49% or their Weight Limit or lower, they can use all of their skills normally and attack normally. In addition, their HP and SP recovery rate will double while sitting. If a player is at 50% or more of their Weight Limit, their natural HP and SP recovery will be disabled and the only recovery methods are from either skills or items. This recovery disable even occurs while the player is sitting. If a player reaches 90% of their Weight Limit or more, the ability to use skills is disabled and any auto-attack abilities are also disabled. The only options available to players is movement, using items, or talking to NPCs.
Some Jobs such as the Merchant Jobs, allow players to increase their personal Weight Limit or to rent a Pushcart to store excess items. In addition, increasing STR increases a player's maximum Weight Limit.
See the Weight Limit page for more information on this mechanic.
Commerce
The currency in the world of Midgard is the Zeny and can be used for purchasing items from players and NPCs, travel, resting, and in some cases, even attacking monsters! Players have a lot of options when it comes to using and storing their money as well as trading both with players and NPCs. For more information on how to get involved with trading, it's recommended that players check out the Commerce guide. LeikaRO also has a Bank option for those that are interested in storing money.
Death Penalty
In RO, death happens. You may be ambushed by monsters or engage in combat that you aren't prepared for. When you die, you lose 1% of your Base and Job Experience. This has been disabled in towns, Battlegrounds, PvP, WoE, and some event maps. Be careful!
Stats
When a player gains a new Base Level, they have the opportunity to spend Status Points on various attributes ("Stats") in their character window for various effects, such as increasing their max HP, increasing ATK or MATK, and more. There are 6 main stats in the game:
Every stat has a minimum of 1 point put into it at the creation of every character. If the character has changed to their Second Job, they can put up to 99 points into a single stat. Once the character has reached their Third Job, they can put up to 130 points into a single stat. Each stat provides various benefits. As characters progress in their chosen Jobs, they will find that certain stats naturally improve; Jobs provide natural stat increases in certain stats, depending on the Job itself. Below is a brief summary of each, but new players are strongly encouraged to look at the Stats page for more detailed information.
STR
STR represents physical prowess, including Physical Attacks and Weight Limit.
For each point added to STR, players will:
- Get +1 Status Attack (ATK)
- Get +0.5% Weapon (Neutral element) Attack (WATK)
- If the player is using Bows, Guns, Instruments, or Whips, they must add 5 points into STR to get +1 weapon ATK
AGI
AGI represents evasion and speed in combat. It should be noted that AGI does not directly affect After-Cast Delay. However, AGI does improve ASPD, which reduces the animation delay for many skills, making AGI a viable investment to help increase skill rate cast provided Cast Time and After-cast Delay have been reduced suffiently.
For each point added to AGI, players will:
- Get +1 FLEE
- Increase Attack Speed by a small percentage
For every 5 points added into AGI, a player's Soft Defense increases by +1.
VIT
VIT represents bodily health and endurance.
For each point added into VIT, players will:
- Get +1% added to their base HP
- Receive +2% effectiveness from healing items
- Reduce the chance to be Stunned, Poisoned, and Deadly Poisoned by approximately 0.6667%, up to a maximum of 100% chance with 150 VIT. The duration of these Status Effects is also reduced, up to a maximum of 90% duration reduction.
- Durations for Burning, Freezing, and Mode Cold are reduced by 0.1 seconds
For every 2 points added to VIT, a player's Soft Defense increases by +1.
For every 5 points added to VIT, a player's Soft Magic Defense and HP Recovery Rate increase by +1.
INT
INT represents magical aptitude and ability.
For each point added into INT, players will:
- Get +1.5 Magical Attack
- Get +1% added to their maximum SP
- Increase effectiveness of SP Recovery items by +1%
- Decrease their Cast Time
- Increase resistance to Blindness, Sleeping, Chaos and Silence by 0.6667%, up to a maximum of 100% at 150 INT
- Increase successful Brewing rates by 0.05% for Alchemist Jobs.
For every 2 points added into INT, a player's Soft Magic Defense increases by +1.
For every 6 points added into INT, SP Recovery increases by +1.
DEX
DEX represents speed, deception, and working with one's hands.
For each point added into DEX, players will:
- Get +1 Hit Rate
- Get an increase in ASPD
- Get a significant decrease in Cast Time
- Get +1 status ATK and +0.5% (Neutral) Weapon ATK (WATK) when using Bows, Guns, Instruments, or Whips.
- If the player is using any other kind of weapon, they must add 5 points into DEX in order to get +1 status ATK.
- Increase successful Steal rates by 0.01% for Thief Jobs.
- Increase successful Divest rates by 0.2% for Rogue Jobs.
- Increase successful Forging and Brewing rates by 0.1% for Blacksmith and Alchemist Job respectively.
- Increase successful Cooking rates by 0.2%
LUK
LUK represents fortune and the ability to perform something successfully and extraordinarily well.
For each point added into LUK, players will:
- Get +0.3% CRIT
- Increase resistance to Blind, Frozen, Silence, Cursed, Poisoned, Sleeping, Stone Cursed, and Stunned Status Effects.
- Increase successful Forging and Brewing rates by +0.1% for Blacksmith and Alchemist Jobs respectively.
- Increase successful Cooking rates by +0.1%.
- Increase chances for Auto Blitz and Warg Strike by +1% for Ranger Jobs.
Every 5 points added into LUK adds +1 FLEE and +1% CRIT resistance.
Secondary Stats
Secondary stats are attributes that stem from a character's primary stats and affect various aspects of combat, such as defense or attack speed. Unlike primary stats, status points cannot be used to directly increase secondary stats. Secondary stats are improved when their relative primary stat is improved, by specific class skills, or by equipment. The information below is general information on secondary stats. Tlayers are encouraged to read the Stats page for more specific and in-depth information.
ATK
ATK is your ability to deal physical damage to a target. It is comprised of two numbers on your character window (such as "220 + 350"). The first number is your status ATK, which is determined by primary stats. The second is the sum of your weapon ATK and equipment ATK. Even though these are displayed as a sum, they are calculated independently from each other. Some skills may improve ATK, such as a weapon mastery skill, but aren't shown in the character window.
MATK
MATK is the ability to deal magical damage to a target. It behaves the same as ATK but deals exclusively with magic.
DEF
There are two kinds of defense: Soft DEF and Hard DEF. It is typically displayed in the character window as two numbers (such as "20+5"). The first is your Soft DEF. It is determined by your level, status points, and buffs. The second is your Hard DEF, which reduces incoming physical damage by a percentage. It is determined by your equipment and some buffs. Hard DEF also has diminishing returns at higher levels, meaning the more Hard DEF you get, the less you get out of it.
Here's an example of how this affects a character in game. Say the player has 100 Soft DEF and 275 Hard DEF (it would read "100+275" in the character window). A monster attacks them for 500 damage. The player's Soft DEF would reduce the damage by 100 first. 500 - 100 = 400. Having 275 Hard DEF would reduce the remaining 400 damage by 1/3rd. 400 / 3 = 133.3. 400 - 133.3 = 266.7 is the total amount of damage a player would actually take from this attack.
MDEF
Much like how ATK and MATK differ, DEF and MDEF differ in the kinds of incoming damage they reduce. MDEF reduces incoming magical damage and behaves in generally the same ways as DEF. Each point of Hard MDEF increases resistances to Frozen and Stone Curse statuses by 1%. Having high amounts of Hard MDEF is nearly impossible to achieve.
HIT
HIT is the likelihood you will be able to successfully hit a target.
To determine if you will be successful in hitting a monster, use the following formula: [100 + (Your HIT) - (Target's FLEE)] = success chance.
To determine if you will be successful in hitting a target in PvP, use the following formula: [80 + (Your HIT) - (Target's FLEE)] = success chance.
CRIT
CRIT attacks are attacks that deal more damage than normal. They typically deal an extra 40% damage. Using Katars doubles your success chance to land a critical attack. Critical attacks ignore FLEE rates but, contrary to popular belief, do not ignore DEF. A Perfect Dodge can also dodge a critical attack. The CRIT stat works off of a percentage; having 50 CRIT means you will have a 50% base chance to deal a critical hit per auto attack. Some skills have the ability to deal a critical attack but most do not. Magic cannot CRIT. Every 3 LUK increases your CRIT by 1.
Critical Hit Rate
Some Enemies will have enough LUK to gain a small amount of CRIT tolerance or CRIT Shield. For every 5 LUK your target has, your CRIT rate is reduced by 1% down to a minimum of 0%. This penalty isn't shown in your status window but can make a significant difference against high LUK targets.
Perfect Dodge
Perfect Dodging allows you do absolutely dodge auto attacks. Like CRIT, Perfect Dodge works off of percentages; having 100 PD means you will perfectly dodge 100% of auto attacks. You will still be hit by skills and magic.
ASPD
ASPD is the speed in which you attack a target. The maximum ASPD on LeikaRO is 193. This stat is completely dependent on weapon class, skills, stats, and buffs. Having no weapon or shield equipped will dramatically increase your ASPD. Having a higher ASPD will also reduce the animation delay of many skills.
Commands
Commands are specific lines of text that you can enter into the in-game chat box for various effects. Anything that starts with a "/" (ie., "/nc") is an official command from the game client, while anything starting with "@" ("@commands") is a server-specific command, which means that the staff has made this available to the user.
/nc - Turns Auto attack on and off /ns - Turns the ability to use all skills (even supportive skills) on monsters, and also allows you to target other players. /nc and /ns - off & shift + right click - activates auto follow. /showname - will change the appearance of your name /where - will tell you your co-ordinates on the X and Y axis. (200, 399) means 200 across, 399 up. Map coordinates begin in the bottom left most corner of the map, at the (0,0) origin.
@autoloot [insert percentage] allows you to pick up any items that drop at that rate. Example: @autoloot 100 means 100% of everything that a monster drops will automatically go into your inventory. @autoloot 1 means 1% only items that have a 1% chance of dropping will be picked up. @mi [monster name] will allows you to view a monsters status and drops, for example @mi Poring
Check the Commands page for more specific information on various commands available in-game.
Novice Stage
Once you create your character, you begin in the novice training ground. This area lets players get used to various game mechanics and interface components. Completing the quests in the training grounds will get your character to at least level 11, if not higher, and give you a decent stet of starting equipment.
From there, it is strongly recommended that players sign up with the Eden Group as they provide decent equipment and ways to gain experience. And then it's up to the player to figure out how they want to explore the world of RO!
Jobs
There are many Jobs to choose in Ragnarok Online that you can pick from. How on earth do you choose? Well, you first need to know what the different Jobs are. After you reach Job Level 10 and put 9 Job Points into Basic Skill, you can choose what Job you want to change into. You can complete a Job change quest or automatically change Jobs at the Job Genie at the Utility Room in Prontera.
Different Jobs have different attributes and determine their damage output, general survivability, and supportive abilities. Most Jobs can serve many roles but tend to excel in specific areas.
Job Details
Every character starts out as a Novice Job. Once they gain 9 Job Points and increase the Basic Skill to the highest level, they can change their Job to whatever First Job they desire. Once the character reaches Job Level 40 or higher, they can change into their respective Second Job. This decision is important as it determines what branch of the First Job they travel down and will determine if the player becomes an Arch Bishop or a Monk, for example.
It is strongly encouraged for characters to change their Job at the maximum Job Level, as they will lose out on valuable Job Points if they change early. Maximum Job Level characters also tend to gain bonus or special items upon Job change completion. In addition, it is also really recommended for players to Transcend their characters when they reach 99/70.
Transcending vs Straight to 3rd Job
For the core Jobs (Swordsman, Thief, Mage, Archer, Acolyte, Merchant), there are two paths for Job progression in RO:
Novice -> First Job -> Second Job -> Transcend to High Novice -> High First Job -> High Second Job -> Third Job
Novice -> First Job -> Second Job -> Third Job
Once a character reaches Base Level 99 and Job Level 70, they have the option to Transcend. Transcending means that the character is reborn and starts off at Base Level 1 again as a Novice and they must regain the 99 levels they had before Transcending. While this seems like a daunting and unnecessary process, Transcended characters gain 25% more HP and SP as well as 100 bonus Status Points that they can spend as they like. It is highly recommended for players to take the time to Transcend.
In addition, RO has a few other Job options that are outside of the core Jobs and offer different playing styles and options for players. Characters that change to these Jobs cannot Transcend. These Jobs include the TaeKwon Kid, Gunslinger, and Ninja Jobs (as well as their higher forms) and the Super Novice.
First Job Overview
First Jobs are the foundational Jobs. They tend to determine a general play style and offer a broad range of skills for players.
Core Jobs
- Swordsman
- Archer
- Mage
- The quintessential magical "glass cannon." They can dish out magical damage in both single-target and area of effect forms. They are great for nuking many enemies at once and also using many crowd control skills, from inflicting Status Effects to immobilization. They have very low HP and low mobility. They turn into Wizards and Sages.
- Thief
- Acolyte
- Merchant
- A very powerful but very expensive Job to create. They have a range of supportive and offensive skills and are most well-known for their Vending abilities and being able to haggle with vendors using Overcharge and Discount. They have medium to high damage potential and medium HP. They turn into Alchemists and Blacksmiths.
Expanded and Extended Jobs
- Super Novice
- The "Jack of all trades, master of none" Job. This is the only Job that requires the character to be at Base Level 45 and Job Level 10 in order to change. This Job has the ability to use a select group of skills from the core First Jobs. Once they reach 99/99, they can change into an Expanded Super Novice, allowing them to learn specific skills from the core Second Jobs and have their max levels extended to 175/60. There are also some secrets unique to this Job.
- TaeKwon Kid
- This Job uses Bare Handed attacks and can use TaeKwon Mission to achieve Fame Points, similar to the Blacksmith's ranking. They turn into Soul Linkers and Star Gladiators.
- Ninja
- Gunslinger
Job Details
Below are basic ideas for the different Jobs. It is encouraged for players to try their own Job builds and see what works best for them.
Ratings are based off the amount of skills needed and general difficulty in comparison to other Jobs.
- A 0 is considered very easy.
- A 5 is considered intermediate
- A 10 is considered very difficult.
Anything ranked 8 or more is generally not recommended for new players.
Swordsman
Knight
- Job Progression: Knight -> Lord Knight -> Rune Knight
- Preferred Weapons: Spears, Shields, One-Handed Swords, and Two-Handed Swords
- Preferred Stats: Focus on STR/VIT or AGI/DEX in that order depending on play style.
- Core Skills: Bowling Bash, Parry, Clashing Spiral, Dragon Breath, Hundred Spears, Ignition Break
- PvP Difficulty Rating: 4/10
- Requires the attention of multiple allies to kill. Relies heavily on spamming and can run out of materials very quickly. Requires knowledge of runes from Rune Mastery and some knowledge of reacting to situations. Fairly easy to use.
- PvE Difficulty Rating: 3/10
- Very good at tanking enemies but requires a lot of SP sapping in order to excel at PvE. Not a difficult Job to use.
Knights are a strong Job for PvP, WoE, PvE, and MVP situations. They have high HP and high DPS and are able to sustain long fights. Their high mobility allows them to more easily weave through the battlefield. They are definitely meant to be played on the front line, typically as a tanking character, and can attain high ASPD. In addition, they get access to a Dragon mount.
Crusader

- Job Progression: Crusader -> Paladin -> Royal Guard
- Preferred Weapons: One or two-handed Spears
- Preferred Stats: Focus on STR/VIT/AGI or STR/DEX/VIT in that order.
- Core Skills: Holy Cross, Auto Guard, Reflect Damage, Banishing Point, Overbrand, Prestige, Inspiration
- PvP Difficulty Rating: 1/10
- This Job is very easy to use for new players as it has a naturally high ability to tank. This Job's support buffs are very strong and they are capable of maintaining high mobility while dealing a lot of damage.
- PvE Difficulty Rating: 5/10
- Make use of Area of Effect skills and potions to succeed in PvE environments. It is suggested that you party up with a Soul Linker for their Kaahi skill. This Job also can consume a lot of potions, depending on how much damage is taken in battle, which can add up to a lot of money.
Crusaders are a great Job for PVP, WoE, and MVP environments. They excel at taking in a lot of damage with their high HP pools and their skill Devotion. They can maintain fights very well and can move around a lot on the battlefield while dealing large amounts of damage to their enemies. With Reflect Damage, they are a nightmare for physical damage dealers.
Archer
Hunter
- Job Progression: Hunter -> Sniper -> Ranger
- Preferred Weapons: Bows
- Preferred Stats: AGI/DEX/LUK and then INT or STR in that order.
- Core Skills: Double Strafe, Attention Concentrate, Ankle Snare, Arrow Storm, Warg Strike, Unlimit
- PvP Difficulty Rating: 2/10
- This Job is very simple to use in PVP environments. They have high mobility and high ASPD, which makes them very useful for destroying the opponent's Emperium in WoE. Be careful, though, as this Job also has relatively low HP, which means they can become prime targets for enemy attacks. They require, typically, a few self-buffs and an active trap, typically Ankle Snare.
- PvE Difficulty Rating: 1/10
- This is by far one of the easiest Jobs to level with in the game and does very well in various PvE environments. It is a highly recommended Job for those that aren't as familiar with MMOs.
The Hunter Job excel at using Bows to deal high speed, long-ranged damage to enemies. This Job does well in PvP and PvE environments as it can easily dish out major amounts of damage. Players need to keep an eye on their HP pools, though, as they do not have high amounts of health like other Jobs. In addition, this Job comes with a Warg mount and a Falcon companion.
Performers

- Job Progression: Bard/Dancer -> Clown/Gypsy -> Minstrel/Wanderer
- Preferred Weapons: Instruments, Whips, and Bows
- Preferred Stats: DEX/AGI/INT in that order for damage, VIT/AGI/INT for high survivability.
- Core Skills: Double Strafe, Severe Rainstorm, Windmill Rush, Harmonize, Marionette Doll, and Songs
- PvP Difficulty Rating: 8/10
- This Job does not have many options for damage which means most players will find themselves in support positions during PvP. While it has its strategies, it is not a recommended Job for PvP environments unless you are in a party.
- PvE Difficulty Rating: 4/10
- Performers can level themselves fairly well in PvE environments, using Severe Rainstorm for DPS, which allows it to grind and level at a reasonable pace. Players will probably find it easier to level with a party, especially with other Jobs that can deal out more damage. Their buffs and debuffs truly shine in PvE environments with multiple party members.
Performers are incredibly underrated Jobs. With their wide arsenal of skills, they are able to cast incredible buffs and debuffs that are useful in just about every situation, in both PvP and PvE environments. This Job does suffer from no mobility and very low HP pools. While they have the potential for good Area of Effect damage, they excel in support roles, especially in parties.
Magician

Wizard
- Job Progression: Wizard -> High Wizard -> Warlock
- Preferred Weapons: One or two-handed Staves
- Preferred Stats: INT/DEX/VIT/AGI, STR for Weight Limit or LUK for MATK and to help with Status Effects
- Core Skills: Recognized Spell, Chain Lightning, Crimson Rock, Reading Spell Book, Soul Expansion, White Imprison
- PvP Difficulty Rating: 6/10
- This Low HP and High DPS, it acts like a more versatile Ranger, dealing huge amounts of damage as long as you don't get killed by another or by a melee Job who got too close. It's so/so to use, even with the most basic knowledge you can spam skills on this Job and get some kills. However there's a lot of depth to this Job to explore. To master this Job takes a lot of time and effort, not just spamming.
- PvE Difficulty Rating: 6/10
- Not the most straightforward class to level but has a lot of advantages over other classes with the proper knowledge of enemies Elemental weaknesses. Safety Wall and Energy Coat decrease your incoming damage while you either kill mobs with high damage skills or slow them down with Quagmire. Storm Gust, Frost Nova and Jack Frost are also great tools to disable mobs for you to follow up with long cast time spells. The Mora Warlock Armor is a cheap and easy way to obtain elemental armors and the set is also decent for starting gear. You can use Drain Life to heal yourself while Soul Drain ensures you have enough SP for skills even without support.
Super High Nuking Job with low HP and suffers from lack of skill points for each useful skill. Many hard choices await. One of the best at PvE and WoE to be able to pick off key targets at the back line in 1 or 2 hits. With also many Crowd control abilities this Job is not meant to be played in a linear fashion. However its MvP and PvP capabilities are somewhat limited. Your damage output is heavily tied to the MvPs element and MDEF with MDEF-piercing gear being rare. Nevertheless with proper gears and party buffs it can outperform most other DPS, especially against MvPs that have anti-physical skills such as Stoneskin or Defender.
Sage
- Job Progression: Sage -> Professor -> Sorcerer
- Preferred Weapons: Staves, Books and Daggers
- Preferred Stats: INT/DEX/VIT
- Core Skills: Striking, Psychic Wave, Insignia and Elemental Spirits, Vacuum Extreme, Dispel, Land Protector, Soul Change, Safety Wall
- PvP Difficulty Rating: 8/10
- To master this Job requires an RO Ph.D. This Job has a plethora of skills, some high DPS, others brilliant CC, but all the choice makes the Job a bit crazy to use. You need plenty of experience and great reaction times to know what skill to use when. Wouldn't recommend it as your first Job, but would recommend it when later on.
- PvE Difficulty Rating: 3/10
- Very easy to level, just walk and cast while mobbing. Pretty simple.
If Warlocks are the Super High Nuking, Sorcerers are the Super High Crowd Control, these guys are the kings of PvP and extremely deadly WoE players and proficient PvE players. With brilliant buffing abilities for supporting without status changes, Sorcerers are scary beasts in the right hands. With a range of CC skills, debuff skills and High damage spells, they tend to not get the respect Sorcerers actually deserve in the PvP room. They have various buffs such as Endowing and Striking to boost their own and others damage immensely. They can also summon their own minions to add element damage.
Merchant

Blacksmith
- Job Progression: Blacksmith -> Whitesmith -> Mechanic
- Preferred Weapons: One or two-handed Axes,Maces
- Preferred Stats: STR,DEX,VIT
- Core Skills: Cart Termination,Major Buffs, Mado Gear Skills, Self Destruct, Axe Tornado, Axe Boomerang, Mammonite
- PvP Difficulty Rating: 8/10
- This Job takes a lot to master, his Low DPS and all or nothing self destruct skill, makes it a pretty risky choice. Honestly it's meant to be a tech-support character. So it's PvP abilities aren't great, but still interesting in the right hands. Would not recommend for first timers.
- PvE Difficulty Rating: 5/10
- Good amount of AoE clear, medium damage, medium to high HP, however requires a lot of pots to sustain. With new gear, this Job can clear PvE very easily.
Once one of the most feared PvP classes, this class is now a Support type class, with technological based Buffs and debuffs, this class is something ignored by many for WOE purposes a bit like minstrel/wanderer. Most people don't know hot to react when faced against a support mechanic, and its unique buffs add a very decent edge to the battle field. With Medium level damage and High survivability potential, and one hell of a suicide exit from the battlefield, I would like to see more competitive Mech's. This class is good for Forging and as a Master smith as the upgrade rate is based on Job level, you must be job 70 to have maximum chance, aka the Transcendent. A job level 50 mechanic has the same refine rate chance. Note that forging now in renewal isn't actually very good. Since enriched and HD ori/elu's where introduced, their worth has dropped significantly, and I cannot recommend you create one unless you plan to upgrade in a massive bulk. You can upgrade both weapons and armors.
This Job has SO many versions ill just name a few. Example: Forging - 125 dex 125 luk rest int, cart termo - 100 str, 120 agi, 90 dex, Mado gear - 110 str, 120 dex, 100 Int, some vit.
Alchemist

- Job Progression: Alchemist -> Creator -> Genetic
- Preferred Weapons: One or two-handed Axes, Maces, One-Handed Swords
- Preferred Stats: STR/DEX/INT/VIT
- Core Skills: Acid Demonstration, Cart Cannon, Homunculus, Demonic Fire, Fire Expansion, Plant Skills
- PvP Difficulty Rating: 7/10
- Highly Mobile, can have decent survivability, reliant on 3 skills, and has insane damage. The hardest thing about PvP for this Job is getting the materials.
- PvE Difficulty Rating: 5/10
- This class requires some gear to be effective in pve. It has decent aoe clearing and great single target damage for mvping however mvping can be hard early on because most strong weapons are 2 handed leaving you without a shield.
Extremely potent MvP, PvP and WoE players, with incredible damage potential. They use pets called Homunculus which help them battle. They have brilliant mobility and plant based skills with high damage, however as many DPS, suffer from average HP. Easily in the top 5 PvP Jobs, however very expensive as a price to pay. The Job does have the vending ability with Blacksmith, so can be used as a vending alternate character.
Thief
Assassin
- Job Progression: Assasin -> Assasin Cross -> Guillotine Cross
- Preferred Weapons: Katar, Dagger
- Preferred Stats: STR/AGI/DEX
- Core Skills: Rolling Cutter, Cloaking Exceed, Enchant Deadly Poison, Poisons, Dark Crow, Grimtooth
- PvP Difficulty Rating: 3/10
- Go invisible, pop out, instantly kill someone. Normally I'd give this Job a 1, however to actually master this Job, you need some skill under your belt.
Impact Dancing and Backslide dodging are legitimately difficult to pull off. It's a fun Job for newcomers and old veterans.
- PvE Difficulty Rating: 6/10
- Requires some money to spam potions with and a few other classes to support it because limited options for reduction gears, but a very solid pve class.
High DPS, high HP, high mobility, with many unique abilities to cause CC. The class is one of the easiest to control within PvP with very rewarding features. (Without trying offend any GX players) I'd put it with the Expensive noobtube category. However I would be lying if it isn't a fun class to play. The items required to reach its damage peak are very rare. With a variety of high damage skills and extremely high speed, killing becomes a matter of keeping count in PvP. However due to Flee in WoE being close to useless, most damage based GX swap to Health, making them pretty tanky, but unless you gear swap efficiently, you're still 1 shot-able. This class can MvP surprisingly well, rivaling Rangers and Sura if geared correctly.
Example: Str/Agi/Dex, 125 str/110 agi/100 dex (double impact build), or 120 str/100 vit/110 dex/rest int (Normal build)
Rogue
- Job Progression: Rogue -> Stalker -> Shadow Chaser
- Preferred Weapons: Bow, Dagger, One-Handed Swords
- Preferred Stats: DEX/VIT/INT/STR
- Core Skills: Plagiarism, Reproduce, Strip Skills, Masquerades, Triangle Shot, Fatal Manace
- PvP Difficulty Rating: 8/10
- This class has High HP, and depending on build, decent attack speed. However it's RO's debuffing class.
You won't kill anyone, you will make them want to kill you; this is the troll Job. Mastering this Job is very hard, because you need to get into close range to cast your skills and you need to realize that you won't be killing them. This means if there are other people around, it leaves you open to getting back stabbed.
- PvE Difficulty Rating: 6/10
- This Job is a lot harder to level than many other Job, due to its complete lack of damage abilities. You will need to copy some skill and level using traps or bows. You will need to use the Eden quests.
This class has incredible Debuffing skills, it's pretty much the only class that can dedicate itself to debuffing an opponent and leaving the rest to your guild mates / buddies.The character I would claim is the funniest in the game, with its range of completely unique abilities to suppress all opponents and make them useless no matter what the gear. The price is Low DPS in exchange for good mobility and high durability and an incredibly high skill cap, in order to lay down the skills necessary and survive it all. A geared Shadow Chaser can be a reasonable good DPS against MvPs with Triangle Shot but you will have a hard time competing against really heavy hitters. The better choice for MvPs parties is to support them with Maelstrom to protect against Magic or Raid for 20% increased. You also have the option to tank or lure mvps with Soul-link giving you Dispell immunity and Reject Sword
Acolyte

Priest
- Job Progression: Priest -> High Priest -> Arch Bishop
- Preferred Weapons: Staves, Maces
- Preferred Stats: INT/VIT/DEX
- Core Skills: High Heal/Coluseo Heal/Heal, Clementia/Blessing, Cantocandidus/Increase AGI, Sacrament, Lex Aeterna, Assumptio, Aspersio
- PvP Difficulty Rating: 2/10
- Has a staggering amount of self buffs which are easy to understand. Relies on 2 skills for PvP, pretty simple.
- PvE Difficulty Rating: 9/10 (If soloing) 5/10 (if in party)
- This Job, like SC, Maestro and Mechanic, is not built for leveling solo, you will find it very difficult to level it alone. However luckily, it happens to be one of the most popular Jobs to level with, because of its supportive abilities. It's also very key to defeating certain MvP's at the later levels, so if you are joining with friends, one of you should pick up this Job.
This class is the ultimate support, with the ability to do real damage if you wish to build it that way, it shines most in its ability to buff and save your friendlies by using clutch safety walls/ pnuema and Lex/Divinia's. This is the White Mage of RO, with a place in every ET/MvP/PvP/WoE/BG party ever. nuff said. play it.
Example: Int/Vit/Dex. 100 int/100 vit/100 dex/60 luk
Monk

- Job Progression: Monk -> Champion -> Sura
- Preferred Weapons: Maces, Knuckles
- Preferred Stats: STR/INT/DEX/VIT
- Core Skills: Asura Strike, Snap, Rising Dragon, Gentle Touch, Combo Skills, Flash Combo, Steel Body
- PvP Difficulty Rating: 7/10
- This Job is the most extreme of any Job in the game. It's one of the easiest to pick up for PvP, but at the same time the hardest in my honest opinion to master. It huge variety of skills, and general build versatility makes it extremely adaptable to other players PvP strategies in the right hands. It also does the most single target damage in the game.
- PvE Difficulty Rating: 4/10
- The early levels are difficult until you pick up flash combo and rising dragon. It has great single target damage and built for MvPings, so that's how you'll be leveling. After a certain point, PvE will just be about gear, not levels.
These beasts do the single most damage in the game. This class is one of the most versatile in the game, with a range of melee and long range damaging skills, as well as CC capabilities to deal with almost any situation. However a Sura can usually only go one way. (Same situation as warlocks) Almost all skills dependent on a limited exclusive resource - Spheres. Can be a very strong tank with highly limited mobility. Very item and skill dependent.
Expanded and Extended Jobs
Kagerou/Oboro
- Job Progression: Ninja -> Kagerou/Oboro
- Preferred Weapons: Huuma Shurikens, Daggers
- Preferred Stats: STR or INT/DEX/VIT
- Core Skills: Bakuretsu, Huuma Shuriken Ranka, Ninpou Magic Skills, Izayoi, Zangetsu, Elemental Charms, Cast-off Cicada Shell
- PvP Difficulty Rating: 3/10
- Kagerou and Oboros are because of Cast-off Cicada Shell,Illusionary Shadow and Meikyo Shisui a very difficult matchup for any physical class. While your opponent will have trouble hitting you at all you can pick them off with Bakuretsu, Final Strike or spam magic skills with no delay. Zenkais are a good way of inflicting status to annoying targets while Setsudan can dispel and deal damage to Soul Link buffed Shadow Chasers. The more PvP oriented Kagerou also has Kagehumi for hidden targets, Kyoumu to disable damage reflect abilities and Jyumonjikiri combined with Kagemusha to deal large amounts of melee damage. You still need to beware of magic classes since without shield most magic spells will instantly kill you.
- PvE Difficulty Rating: 2/10
- Cast-off Cicada Shell and Illusionary Shadow will protect you from physical damage, while elemental armors will mostly protect against magic. Any time your HP or SP is low you can use Meikyo Shisui to recover to full. Additionally it also has a chance to block all types of damage which makes it another type of defense you can use. Huuma Shuriken Ranka, Bakuretsu and Ninpou magic spells need some basic gears to do decent damage but scale very well with buffs and good gears.
Rebel

- Job Progression: Gunslinger ->Rebel
- Preferred Weapons: Guns
- Preferred Stats: DEX/VIT/AGI, STR or LUK
- Core Skills:Fire Dance, Shattering Storm, Banishing Buster, Slug Shot, Mass Spiral, Hammer of God, Quick Draw Shot, Crimson Marker, Bind Trap, Platinum Alter
- PvP Difficulty Rating: 7/10
- Absolute glass cannon in pvp with high damage and utility skills but not many defending options. Pretty much any skill from Rebel has potential to do huge damage or outright kill even geared classes. Shotgun is a good choice for pvp since Shattering Storm can break a random gear (even manteau or footgear) while Banishing Buster will dispel any annoying buffs your enemy has. Grenade Launchers can also be an interesting choice because of the wide range of potential status effects you get with Ground Drift. While these skills make you deadly any attack will also be deadly to you without the ability to use shields with a weapon or any proper defending skill.
- PvE Difficulty Rating: 7/10
- Rebels damage is very hard to match for any class but that comes with the downside of high sp and bullet use. Whichever guns you end up prefer using your damage will always be great. Rebel Weapons are easy to get by buying them from the Rebellion Weapon Dealer, but can end up quite expensive if you want to slot and refine them for maximum damage. Bind Trap slow down and does high def-ignoring damage which is based on your targets or you own HP in case of boss type mobs. You can chain it with Hammer of God to kill even high level mobs. Gatling guns combined with Quick Draw Shot and Eternal Chain enable you to do Warg Ranger amounts of damage to MvPs and their spawns if they are targeted by Crimson Marker, alternatively you can use Mass Spiral against high def MvPs or a highly buffed Slug Shot.
Rebel excel at ranged attacks, dealing massive amounts of Area of Effect damage, and inflicting secondary effects, such as applying and removing buffs and destroying enemies' equipment.
Leveling
This one is short and sweet and can be applied to almost every Job, the Jobs that can't tend to need a party which can anyways.
Grinding
It is recommended to finish Novice Grounds and join Eden Group right away, but if you're up for some good old grind...
- Levels 1-3 - Kill a poring west of Izlude, the town you will start in.
- (This will get you job level 10)
- Levels 3-9 -Once job changed, kill a few more porings.
- (Just to build up some HP and hit rate before payon duneon)
- Levels 9 -30 - Payon dungeon lvl 1.
- (Your first dungeon, stay on the first floor)
- Levels 30-55 - Orc Dungeon lvl 1
- (Stay here until job change, then either go back or move onto the the next step)
- If physical Job - Orc dungeon to 70, if Magic/Long ranged - Geographer to 75
- Glast Heim St.Abbey to 86 (Do repeatable Eden quests - evil druid and wraiths)
- Dark Priests or Stapo to 99 (Eden quests included)
- 1-15 Anything 1 east of Prontera
- Repeat process up top to 99.
- 100 - 108 - Ra_fild05 - Kobolds
- (Lighthalzen, 2 maps north, 1 map west)
- 108 - 117 - Mag_dun02
- (Try to mob sufficiently by using flywings, many classes may struggle and require many potions. Note this area is great for grinding Zeny.)
- 117 - 135 - Juperos
- (The same as Magma dungeon. Note this is one of the best spots for grinding Zeny.)
- 135+ - Scaraba
- (Just stay here until maximum level or until you feel your ready to MvP hunt.)
Eden
Use the Warper to walk to Eden Headquarters, and talk to “Secretary Lime Evenor”. There you will sign up for the Eden quests, allowing you to get new equipment and access more quests to ease leveling. Novices should go this route. Eden is also a very easy way to level. I would start using them at level 71-85, Evil druids and Wraiths are the quickest tasks to complete with the most pay out. From 86-91 I'd do the Turtle Island tasks. 91-99, all the Rachel/veins tasks first. Then all the turtle island quests, followed by the Dark priests/Stapo/Siroma/Roween/Soldier/Freezer/Heater. This should take you to 99. If not, you can either grind it, or just complete 1 or 2 of the other region quests. If you complete more than you need, you can turn them in once you rebirth for an extraordinary amount of exp.
For newcomers, for both equipment and exp, I highly recommend you follow the Eden quests for leveling. The exp reward is more than enough per hand in. Assigning quests and handing them in for rewards is simple.
These monsters are hunted within places where you may often find yourself going back to for gear or quests, giving you a good foundation of the sorts of areas you will have to trek through, throughtout the game. However in all honesty 90% of people just go on http://www.divine-pride.net/ in order to find what they are looking for.
Each hand in has a cool down, you can check them in the quest interface.
Equipment
Ok, so In actuality each class has it's own specific set of gears. No other class will use a Katar like the assassins do or a Bow like the Rangers, Minstrels and Wanderers do. However there is some overlap. Some pieces of equipment which are valued as important across all classes. I will explain these gears, the gears which almost everyone should have in their back pocket anyway.
I shall also explain some gears which you may not have heard of and how to acquire them.
Cards
- Raydric Card
- Increase resistance to Neutral Property attacks by 20%.
- Used for defence in PvP
- Thara Frog Card
- Reduce damage from DemiHuman monster by 30%.
- Arguably one of the strongest defence cards in the game for PvP
- Alice Card
- Receive 40% less damage from Boss monster.
- Receive 40% more damage from normal monster.
- Used for defence against MvP's
- Marc or Evil Druid Card
- Gain protection from the Freeze status and increase resistance to Water Property by 5%. (Marc)
- Enchant Armor with the Undead Property.
- INT + 1, DEF + 1 (Evil Druid)
- Marc will grant immunity to frozen status and dramatically reduce damage from water spells, however Wind spells will do 100% more damage.
- Evil Druid will grant immunity to Stone Curse and Frozen status effects, however Fire and Holy damage will do significantly more in the process.
- Hydra or Zakudam Card
- Increase damage on DemiHuman monster by 20%.
- Increases magic damage against Demihuman monsters by 10%.
- Hydra being the physically offensive card (this includes ranged physical like AD bomb and arrows), Zakudam being the magical.
- Smokie Card
- Enables use of Level 1 Hiding.
- Use this for the Hide dodge manoeuvre which I will cover later, or for general hiding tricks.
- Horong Card
- Enables use of Level 1 Sight.
- Reveals invisible enemies like Guillotine Crosses when the radius of Sight hits a target.
- Scaraba Card/Golden Scaraba Card
- MATK + 20, Max SP - 1% (Scaraba)
- ATK + 20, Max HP - 1%. (Golden Scaraba)
- Scaraba card is used for Magical attack, Golden Scaraba is used for Physical attack
- Kukre Card
- AGI + 2
- A strong card for EMP breakers (see WoE guide), or anyone who wants maximum attack speed
- Green Ferus Card
- VIT + 1
- Maximum HP + 10%
- The important part of all this is the maximum HP, this card can be used on any character in order to improve survivability; apart from maybe ranger.
- Abysmal Knight Card
- Increase damage on Boss monster by 25%.
- Extremely useful for contesting and killing MvP's, works with every Job (just don't try to MvP with a magical Job...)
- Porcellio Card
- ATK + 25 DEF - 5
- Strong for physical attack
Other Gears To Check
Mora Gear, Vellum Gear (Not available on this server), New World Gear, MvP drops, WoE (Siege) (Not available here) Gear, Crafting and Battleground/KvM gear.
These are all "End Game" gear sets!