Difference between revisions of "Mors' Cave"
Terpsichore (Talk | contribs) |
Terpsichore (Talk | contribs) |
||
| (38 intermediate revisions by 2 users not shown) | |||
| Line 1: | Line 1: | ||
{{Infobox Instance | {{Infobox Instance | ||
|level = 160+ | |level = 160+ | ||
| − | |party = | + | |party = 1+ Player |
|quest = [[Bios Island (Quest)]] | |quest = [[Bios Island (Quest)]] | ||
| − | |duration = | + | |duration = 90 Minutes |
|cooldown = 23 Hours | |cooldown = 23 Hours | ||
|image = MorsCave.png | |image = MorsCave.png | ||
}} | }} | ||
== Overview == | == Overview == | ||
| − | + | ||
The second instance related to the [[Episode 14.3]] which you can access after clearing [[Bios Island]] once. | The second instance related to the [[Episode 14.3]] which you can access after clearing [[Bios Island]] once. | ||
| − | In this instance, you and and your party are teleported from one small room to another and flooded with waves of undead monsters, until eventually confronting Mors. While mechanically simple, this instance requires an organized group that balances its survivability and damage output very well, as it's rather easy to get swarmed by the waves of undead. The layout also makes positioning very important since there isn't much room to navigate. | + | In this instance, you and and your party are teleported from one small room to another and flooded with waves of undead monsters, until eventually confronting Mors.<br> |
| + | While mechanically simple, this instance requires an organized group that balances its survivability and damage output very well, as it's rather easy to get swarmed by the waves of undead.<br> | ||
| + | The layout also makes positioning very important since there isn't much room to navigate. | ||
== Background and Lore == | == Background and Lore == | ||
| − | Ankou is up to no good once again. This time the action takes place in a dreamlike world that's a reflection of a real location, the secret underground complex where Mors perfected his dominion over the art of necromancy. This time you don't get to confront Ankou directly but instead face the endless waves of undead and other illusions he has created. At the end, Ankou raises Mors to stop your group. Nothing is known about Mors, but the architecture of the place indicates that his history may very well go back to the time when Ymir was still whole. As you dispatch the undead minions of Ankou, you begin to realize that you're being toyed with and all your efforts are only speeding up the resurrection of Morroc... | + | |
| + | '''Ankou''' is up to no good once again. This time the action takes place in a dreamlike world that's a reflection of a real location, the secret underground complex where '''Mors''' perfected his dominion over the art of necromancy. This time you don't get to confront Ankou directly but instead face the endless waves of undead and other illusions he has created.<br> | ||
| + | At the end, Ankou raises Mors to stop your group.<br> | ||
| + | Nothing is known about Mors, but the architecture of the place indicates that his history may very well go back to the time when Ymir was still whole.<br> | ||
| + | As you dispatch the undead minions of Ankou, you begin to realize that you're being toyed with and all your efforts are only speeding up the resurrection of '''Morroc'''... | ||
Inside you also meet an old acquaintance and member of the expedition that helps you out by distracting Ankou. Eventually getting caught, his soul separated from his body and later used to bring back Mors. Surprisingly, your companion doesn't perish but instead weakens Mors before continuing his chase of Morroc. The rules of this place make no sense at all. | Inside you also meet an old acquaintance and member of the expedition that helps you out by distracting Ankou. Eventually getting caught, his soul separated from his body and later used to bring back Mors. Surprisingly, your companion doesn't perish but instead weakens Mors before continuing his chase of Morroc. The rules of this place make no sense at all. | ||
| + | |||
| + | |||
| + | == Tips == | ||
| + | |||
| + | The fight against Mors is divided into two phases, first you face his spirit form, '''Warlock Mors''', a ghost property spellcaster.<br> | ||
| + | While slow, he dishes out large amounts of spell damage without rest and applies nasty debuffs.<br> | ||
| + | It's a good idea to watch out for the '''Stone Curse''' + '''Crimson Rock''' and '''Jack Frost''' + '''Varetyr Spear''' combos and remove the statuses before the next spell goes out.<br> | ||
| + | There are no undead monsters being summoned during this phase but the group will get hit by area spells from time to time so don't slack. | ||
| + | |||
| + | Once defeated, Mors will assume his real form, '''Necromancer Mors''', an undead spellcaster that shields itself with walls of minions.<br> | ||
| + | From this description alone, you should know what to expect; endless waves of undead monsters, area spells and nasty debuffs.<br> | ||
| + | This encounter is an aggravated version of what you experienced beforehand, and while you can potentially get rid of Mors quickly, so can he eliminate your group.<br> | ||
| + | Your group must balance the killing of undead minions with damaging Mors while staying alive.<br> | ||
| + | If things look grim and you're getting swarmed, it's a good idea to stop provoking Mors with attacks while clearing out the minions and replenishing the group. | ||
== Monsters == | == Monsters == | ||
| − | {| class="wikitable | + | |
| + | {| class="mw-collapsible mw-collapsed wikitable" | ||
| + | ! colspan="8" | Mors' Cave Monsters | ||
|- | |- | ||
! Name !! Level !! [[HP]] !! [[Size]] !! [[Race]] !! [[Elements]] !! [[Experience|Base EXP]] !! [[Experience|Job EXP]] | ! Name !! Level !! [[HP]] !! [[Size]] !! [[Race]] !! [[Elements]] !! [[Experience|Base EXP]] !! [[Experience|Job EXP]] | ||
|- | |- | ||
| − | | [[image:GhoulOfMors.gif]]<br>Ghoul of Mors || 158 || 295,240 || Medium || Undead || Undead 3 || 278,775 || 241,500 | + | | [[image:GhoulOfMors.gif|link=|caption]]<br>{{Monster | id = 3001 Ghoul of Mors}} || 158 || 295,240 || [[Size#Medium|Medium]] || [[Undead (race)|Undead]] || [[Undead|Undead 3]] || 278,775 || 241,500 |
|- | |- | ||
| − | | [[image:ArcherOfMors.gif]]<br>Archer of Mors || 158 || 295,240 || Medium || Undead || Undead 2 || 278,775 || 241,500 | + | | [[image:ArcherOfMors.gif|link=|caption]]<br>{{Monster | id = 3003 Archer of Mors}} || 158 || 295,240 || [[Size#Medium|Medium]] || [[Undead (race)|Undead]] || [[Undead|Undead 2]] || 278,775 || 241,500 |
|- | |- | ||
| − | | [[image:OsirisOfMors.gif]]<br>Osiris of Mors || 158 || 442,860 || Medium || Undead || Undead 4 || 1,115,100 || 966,000 | + | | [[image:OsirisOfMors.gif|link=|caption]]<br>{{Monster | id = 3002 Osiris of Mors}} || 158 || 442,860 || [[Size#Medium|Medium]] || [[Undead (race)|Undead]] || [[Undead|Undead 4]] || 1,115,100 || 966,000 |
|- | |- | ||
| − | | [[image:FakeMorroc.gif]]<br>Morroc? || 160 || 1,771,440 || Large || Demon || Shadow 4 || 5,464,395 || 4,371,525 | + | | [[image:FakeMorroc.gif|link=|caption]]<br>{{Monster | id = 2998 Morroc?}} || 160 || 1,771,440 || [[Size#Large|Large]] || [[Demon]] || [[Shadow|Shadow 4]] || 5,464,395 || 4,371,525 |
|- | |- | ||
| − | | [[image:WraithOfMors.gif]]<br>Wraith of Mors || 158 || 100,000 || Large || Undead || Undead 4 || 139,395 || 120,750 | + | | [[image:WraithOfMors.gif|link=|caption]]<br>{{Monster | id = 3004 Wraith of Mors}} || 158 || 100,000 || [[Size#Large|Large]] || [[Undead (race)|Undead]] || [[Undead|Undead 4]] || 139,395 || 120,750 |
|- | |- | ||
| − | | [[image:RisenHound.gif]]<br>Verit of Mors || 158 || 442,860 || Medium || Undead || Undead 2 || 836,325 || 724,500 | + | | [[image:RisenHound.gif|link=|caption]]<br>{{Monster | id = 3005 Verit of Mors}} || 158 || 442,860 || [[Size#Medium|Medium]] || [[Undead (race)|Undead]] || [[Undead|Undead 2]] || 836,325 || 724,500 |
|- | |- | ||
| − | | [[image:PlanktonOfMors.gif]]<br>Plankton of Mors || 158 || 295,240 || Small || Plant || Undead 4 || 418,170 || 362,250 | + | | [[image:PlanktonOfMors.gif|link=|caption]]<br>{{Monster | id = 3008 Plankton of Mors}} || 158 || 295,240 || [[Size#Small|Small]] || [[Plant]] || [[Undead|Undead 4]] || 418,170 || 362,250 |
|- | |- | ||
| − | | [[image:LudeOfMors.gif]]<br>Lude of Mors || 158 || 885,720 || Small || Undead || Undead 2 || 1,672,650 || 1,449,000 | + | | [[image:LudeOfMors.gif|link=|caption]]<br>{{Monster | id = 3006 Lude of Mors}} || 158 || 885,720 || [[Size#Small|Small]] || [[Undead (race)|Undead]] || [[Undead|Undead 2]] || 1,672,650 || 1,449,000 |
|- | |- | ||
| − | | [[image:WarlockMors.gif]]<br>Warlock Mors || 160 || 4,000,000 || Medium || Undead || Ghost | + | | [[image:WarlockMors.gif|link=|caption]]<br>{{Monster | id = 2999 Warlock Mors}} || 160 || 4,000,000 || [[Size#Medium|Medium]] || [[Undead (race)|Undead]] || [[Ghost|Ghost 3]] || 31,590,000 || 25,272,000 |
|- | |- | ||
| − | | [[image:NecromancerMors.gif]]<br>Necromancer Mors || 160 || 14,000,000 || Large || Undead || Undead | + | | [[image:NecromancerMors.gif|link=|caption]]<br>{{Monster | id = 3000 Necromancer Mors}} || 160 || 14,000,000 || [[Size#Large|Large]] || [[Undead (race)|Undead]] || [[Undead|Undead 1]] || 126,360,000 (MVP EXP: 48,016,800) || 101,088,000 |
|} | |} | ||
== Rewards == | == Rewards == | ||
| + | |||
| + | [[image:ProofOfBravery.png|left|link=|caption]] | ||
=== Proof of Bravery === | === Proof of Bravery === | ||
| − | |||
| + | After successfully defeating Necromancer Mors and exiting the instance through the shadowy portal, ''Demon Tracker'' will reward everyone with one '''Proof of Bravery''' which can be used to purchase and enchant the [[Hero's Signet]]. | ||
| + | |||
| + | |||
| + | [[image:HeroPrize.png|left|link=|caption]] | ||
=== Hero's Prize === | === Hero's Prize === | ||
| − | |||
| − | {| class="wikitable" | + | Necromancer Mors drops two '''Hero's Prizes''', which contain the new Heroic Equipment pieces along with some other goodies.<br> |
| + | This chest has three loot groups and you will always get one random reward from each, with better rewards having a lower chance of coming out. | ||
| + | |||
| + | {| class="mw-collapsible mw-collapsed wikitable" | ||
| + | ! colspan="2" | Hero's Prize | ||
|- | |- | ||
! Reward !! Loot Group | ! Reward !! Loot Group | ||
|- | |- | ||
| − | | Dragon Breath Cocktail x1 || Group A | + | | [[image:DragonBreathCocktail.png|left|link=|caption]] {{item | id = 31221 Dragon Breath Cocktail}} x1 || Group A |
|- | |- | ||
| − | | Stew of Immortality x1 || Group A | + | | [[image:StewOfImmortality.png|left|link=|caption]] {{item | id = 31222 Stew of Immortality}} x1 || Group A |
|- | |- | ||
| − | | Steamed Desert Scorpions x1 || Group A | + | | [[image:SteamedDesertScorpions.png|left|link=|caption]] {{item | id = 31223 Steamed Desert Scorpions}} x1 || Group A |
|- | |- | ||
| − | | | + | | [[image:HwergelmirTonic.png|left|link=|caption]] {{item | id = 31224 Hvergelmir's Tonic}} x1 || Group A |
|- | |- | ||
| − | | Cooked Nine Tail's Tails x1 || Group A | + | | [[image:CookedNineTails.png|left|link=|caption]] {{item | id = 31225 Cooked Nine Tail's Tails}} x1 || Group A |
|- | |- | ||
| − | | Steamed Tongue x1 || Group A | + | | [[image:SteamedTongue.png|left|link=|caption]] {{item | id = 31226 Steamed Tongue}} x1 || Group A |
|- | |- | ||
| − | | Yggdrasil Berry x1 || Group A | + | | [[image:YggdrasilBerry.png|left|link=|caption]] {{item | id = 607 Yggdrasil Berry}} x1 || Group A |
|- | |- | ||
| − | | Yggdrasil Seed x1 || Group A | + | | [[image:YggdrasilSeed.png|left|link=|caption]] {{item | id = 608 Yggdrasil Seed}} x1 || Group A |
|- | |- | ||
| − | | Mastela Fruit x40 || Group A | + | | [[image:MastelaFruit.png|left|link=|caption]] {{item | id = 522 Mastela Fruit}} x40 || Group A |
|- | |- | ||
| − | | | + | | [[image:CondensedWhitePotion.png|left|link=|caption]] {{item | id = 547 Condensed White Potion}} x20 || Group A |
|- | |- | ||
| − | | | + | | [[image:AdvancedWeaponBox.png|left|link=|caption]] {{item | id = 12623 Advanced Weapon Box}} x1 || Group B |
|- | |- | ||
| − | | | + | | [[image:YggdrasilBerryBox.png|left|link=|caption]] {{item | id = 12623 Yggdrasil Berry Box (5)}} x1 || Group B |
|- | |- | ||
| − | | Yggdrasil | + | | [[image:YggdrasilBerryBox.png|left|link=|caption]] {{item | id = 31294 Yggdrasil Seed Box (5)}} x1 || Group B |
|- | |- | ||
| − | | | + | | [[image:PoisonBottle.png|left|link=|caption]] {{item | id = 678 Poison Bottle}} x5 || Group B |
|- | |- | ||
| − | | | + | | [[image:HeroicPlate.png|left|link=|caption]] {{item | id = 15093 Heroic Plate}} x1 || Group C |
|- | |- | ||
| − | | Heroic | + | | [[image:HeroicMagicCoat.png|left|link=|caption]] {{item | id = 15094 Heroic Magic Coat}} x1 || Group C |
|- | |- | ||
| − | | Heroic | + | | [[image:HeroicJudgementRobe.png|left|link=|caption]] {{item | id = 15095 Heroic Judgement Robe}} x1 || Group C |
|- | |- | ||
| − | | Heroic | + | | [[image:HeroicTradeMail.png|left|link=|caption]] {{item | id = 15096 Heroic Trade Mail}} x1 || Group C |
|- | |- | ||
| − | | Heroic | + | | [[image:HeroicHiddenClothes.png|left|link=|caption]] {{item | id = 15097 Heroic Hidden Clothes}} x1 || Group C |
|- | |- | ||
| − | | Heroic | + | | [[image:HeroicTargetSuit.png|left|link=|caption]] {{item | id = 15098 Heroic Target Suit}} x1 || Group C |
|- | |- | ||
| − | | Heroic | + | | [[image:HeroicNepenthesShoes.png|left|link=|caption]] {{item | id = 22035 Heroic Nepenthes Shoes}} x1 || Group C |
|- | |- | ||
| − | | Heroic | + | | [[image:HeroicSilverfoxBoots.png|left|link=|caption]] {{item | id = 22036 Heroic Silverfox Boots}} x1 || Group C |
|- | |- | ||
| − | | | + | | [[image:HeroicUngoliantGaloshes.png|left|link=|caption]] {{item | id = 22037 Heroic Ungoliant Galoshes}} x1 || Group C |
| − | | | + | |
| − | | Heroic Ungoliant Galoshes x1 || Group C | + | |
|} | |} | ||
| + | |||
| + | |||
=== Necromancer Mors' Drops === | === Necromancer Mors' Drops === | ||
| − | {| class="wikitable" | + | |
| + | {| class="mw-collapsible mw-collapsed wikitable" | ||
| + | ! colspan="2" | Necromancer Mors' Drops | ||
|- | |- | ||
! Item !! Drop Chance | ! Item !! Drop Chance | ||
|- | |- | ||
| − | | Hero's Prize || 100% | + | | [[image:HeroPrize.png|left|link=|caption]] {{item | id = 22537 Hero's Prize}} || 100% |
|- | |- | ||
| − | | | + | | [[image:HeroPrize.png|left|link=|caption]] {{item | id = 22537 Hero's Prize}} || 100% |
| − | | | + | |
| − | | | + | |
|- | |- | ||
| − | | | + | | [[image:HwergelmirTonic.png|left|link=|caption]] {{item | id = 31224 Hvermelgir's Tonic}} || 100% |
| + | |- | ||
| + | | [[image:HildisviniTusk.png|left|link=|caption]] {{item | id = 28521 Hildisvini's Tusk}} || 20% | ||
|- | |- | ||
| − | | Thorn Staff of Darkness || 15% | + | | [[image:ThornStaffOfDarkness.png|left|link=|caption]] {{item | id = 1664 Thorn Staff of Darkness}} || 15% |
|- | |- | ||
| − | | Staff of Destruction || 30% | + | | [[image:StaffOfDestruction.png|left|link=|caption]] {{item | id = 2000 Staff of Destruction}} || 30% |
|- | |- | ||
| − | | Frost Giant's Skull || 5% | + | | [[image:FrostGiantSkull.png|left|link=|caption]] {{item | id = 5529 Frost Giant's Skull}} || 5% |
|- | |- | ||
| − | | HD Carnium || 10% | + | | [[image:HDCarnium.png|left|link=|caption]] {{item | id = 6225 HD Carnium}} || 10% |
|- | |- | ||
| − | | HD Bradium || 10% | + | | [[image:HDBradium.png|left|link=|caption]] {{item | id = 6226 HD Bradium}} || 10% |
|- | |- | ||
| − | | | + | | [[image:CardBig.png|left|link=|caption]] {{item | id = 27326 Mors Card}} || 0.05% |
|- | |- | ||
| − | | (MVP) | + | | [[image:TreasureBox.png|left|link=|caption]] (MVP) {{item | id = 7444 Treasure Box}} || 100% |
|- | |- | ||
| − | | (MVP) Old Card Album || 100% | + | | [[image:YggdrasilBerryBox.png|left|link=|caption]] (MVP) {{item | id = 617 Old Purple Box}} || 100% |
| + | |- | ||
| + | | [[image:OldCardAlbum.png|left|link=|caption]] (MVP) {{item | id = 616 Old Card Album}} || 100% | ||
| + | |} | ||
| + | |||
| + | |||
| + | === Cards === | ||
| + | |||
| + | '''Mors Card''' is a normal MVP drop. | ||
| + | |||
| + | {| class="mw-collapsible mw-collapsed wikitable" | ||
| + | ! colspan="3" | Cards | ||
| + | |- | ||
| + | ! Name !! Slot !! Stats | ||
| + | |- | ||
| + | | [[image:Mors.png|left|link=|caption]] {{item | id = 27326 Mors Card}} || Armor || ATK +100<br>HIT +50<br>Max HP -20%<br>'''[Set Bonuses]'''<br>'''Desperate Morroc Card'''<br>Max HP +20%<br>Max SP +10% | ||
|} | |} | ||
== Related Quests == | == Related Quests == | ||
| + | |||
{| class="wikitable" | {| class="wikitable" | ||
|- | |- | ||
! NPC !! Quest | ! NPC !! Quest | ||
|- | |- | ||
| − | |[[image:4_M_JOB_ASSASSIN.gif]]<br>'''Demon Tracker'''<br>Fire Cave | + | |[[image:4_M_JOB_ASSASSIN.gif|link=|caption]]<br>'''Demon Tracker'''<br>Fire Cave |
| '''Name''': [[Confront the Necromancer]]<br>'''Rewards''': 1 {{item | id= 6684 Proof of Bravery}} | | '''Name''': [[Confront the Necromancer]]<br>'''Rewards''': 1 {{item | id= 6684 Proof of Bravery}} | ||
|} | |} | ||
| + | |||
| + | |||
| + | |||
{{Navbox Instances}} | {{Navbox Instances}} | ||
| + | [[Category:Episode 14.3]] | ||
Latest revision as of 05:31, 24 June 2020
| Mors' Cave | |
|---|---|
| |
| Information | |
| Level Range: | 160+ |
| Party Requisites: | 1+ Player |
| Quest Prerequisites: | Bios Island (Quest) |
| Duration: | 90 Minutes |
| Cooldown: | 23 Hours |
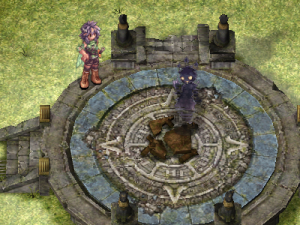
Overview
The second instance related to the Episode 14.3 which you can access after clearing Bios Island once.
In this instance, you and and your party are teleported from one small room to another and flooded with waves of undead monsters, until eventually confronting Mors.
While mechanically simple, this instance requires an organized group that balances its survivability and damage output very well, as it's rather easy to get swarmed by the waves of undead.
The layout also makes positioning very important since there isn't much room to navigate.
Background and Lore
Ankou is up to no good once again. This time the action takes place in a dreamlike world that's a reflection of a real location, the secret underground complex where Mors perfected his dominion over the art of necromancy. This time you don't get to confront Ankou directly but instead face the endless waves of undead and other illusions he has created.
At the end, Ankou raises Mors to stop your group.
Nothing is known about Mors, but the architecture of the place indicates that his history may very well go back to the time when Ymir was still whole.
As you dispatch the undead minions of Ankou, you begin to realize that you're being toyed with and all your efforts are only speeding up the resurrection of Morroc...
Inside you also meet an old acquaintance and member of the expedition that helps you out by distracting Ankou. Eventually getting caught, his soul separated from his body and later used to bring back Mors. Surprisingly, your companion doesn't perish but instead weakens Mors before continuing his chase of Morroc. The rules of this place make no sense at all.
Tips
The fight against Mors is divided into two phases, first you face his spirit form, Warlock Mors, a ghost property spellcaster.
While slow, he dishes out large amounts of spell damage without rest and applies nasty debuffs.
It's a good idea to watch out for the Stone Curse + Crimson Rock and Jack Frost + Varetyr Spear combos and remove the statuses before the next spell goes out.
There are no undead monsters being summoned during this phase but the group will get hit by area spells from time to time so don't slack.
Once defeated, Mors will assume his real form, Necromancer Mors, an undead spellcaster that shields itself with walls of minions.
From this description alone, you should know what to expect; endless waves of undead monsters, area spells and nasty debuffs.
This encounter is an aggravated version of what you experienced beforehand, and while you can potentially get rid of Mors quickly, so can he eliminate your group.
Your group must balance the killing of undead minions with damaging Mors while staying alive.
If things look grim and you're getting swarmed, it's a good idea to stop provoking Mors with attacks while clearing out the minions and replenishing the group.
Monsters
| Mors' Cave Monsters | |||||||
|---|---|---|---|---|---|---|---|
| Name | Level | HP | Size | Race | Elements | Base EXP | Job EXP |
 Ghoul of Mors |
158 | 295,240 | Medium | Undead | Undead 3 | 278,775 | 241,500 |
 Archer of Mors |
158 | 295,240 | Medium | Undead | Undead 2 | 278,775 | 241,500 |
 Osiris of Mors |
158 | 442,860 | Medium | Undead | Undead 4 | 1,115,100 | 966,000 |
 Morroc? |
160 | 1,771,440 | Large | Demon | Shadow 4 | 5,464,395 | 4,371,525 |
 Wraith of Mors |
158 | 100,000 | Large | Undead | Undead 4 | 139,395 | 120,750 |
 Verit of Mors |
158 | 442,860 | Medium | Undead | Undead 2 | 836,325 | 724,500 |
| Plankton of Mors |
158 | 295,240 | Small | Plant | Undead 4 | 418,170 | 362,250 |
 Lude of Mors |
158 | 885,720 | Small | Undead | Undead 2 | 1,672,650 | 1,449,000 |
 Warlock Mors |
160 | 4,000,000 | Medium | Undead | Ghost 3 | 31,590,000 | 25,272,000 |
 Necromancer Mors |
160 | 14,000,000 | Large | Undead | Undead 1 | 126,360,000 (MVP EXP: 48,016,800) | 101,088,000 |
Rewards

Proof of Bravery
After successfully defeating Necromancer Mors and exiting the instance through the shadowy portal, Demon Tracker will reward everyone with one Proof of Bravery which can be used to purchase and enchant the Hero's Signet.

Hero's Prize
Necromancer Mors drops two Hero's Prizes, which contain the new Heroic Equipment pieces along with some other goodies.
This chest has three loot groups and you will always get one random reward from each, with better rewards having a lower chance of coming out.
| Hero's Prize | |
|---|---|
| Reward | Loot Group |
 |
Group A |
 |
Group A |
 |
Group A |
 |
Group A |
 |
Group A |
 |
Group A |
 |
Group A |
 |
Group A |
 |
Group A |
 |
Group A |
 |
Group B |
 |
Group B |
| |
Group B |
 |
Group B |
 |
Group C |
 |
Group C |
 |
Group C |
 |
Group C |
 |
Group C |
 |
Group C |
 |
Group C |
 |
Group C |
 |
Group C |
Necromancer Mors' Drops
| Necromancer Mors' Drops | |
|---|---|
| Item | Drop Chance |
| |
100% |
| |
100% |
| |
100% |
 |
20% |
 |
15% |
 |
30% |
 |
5% |
 |
10% |
 |
10% |
 |
0.05% |
 |
100% |
| |
100% |
 |
100% |
Cards
Mors Card is a normal MVP drop.
| Cards | ||
|---|---|---|
| Name | Slot | Stats |
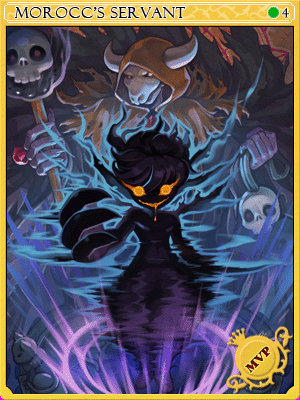 |
Armor | ATK +100 HIT +50 Max HP -20% [Set Bonuses] Desperate Morroc Card Max HP +20% Max SP +10% |
Related Quests
| NPC | Quest |
|---|---|
Demon Tracker Fire Cave |
Name: Confront the Necromancer Rewards: 1 Proof of Bravery |