Devil's Palace
| Devil's Palace | |
|---|---|
| |
| Information | |
| Level Range: | 160+ |
| Party Requisites: | 2+ Players |
| Quest Prerequisites: | Bios Island and Mors' Cave |
| Duration: | 2 Hours |
| Cooldown: | 23 Hours |
Overview
The final instance of the Episode 14.3, only accessible after clearing Bios Island and Mors' Cave.
Organize a powerful party and prepare yourself for the final showdown with Morroc, or Surt if we want to call things by their true names. This instance features no normal monsters at all but a series of boss fights instead. Large, geared and organized party, stocked up with consumables and catalyst is required to tackle this instance. Bring capable damage dealers that can quickly reduce the massive amounts of HP all bosses here possess, and healers that can deal with the constant harm that the whole party receives.
Right at the entrance, you will be met by the palace's gatekeepers, that you most likely already met before, Ahat and Shenime, which became Apostles of Morroc. This fight works as a quick and deadly check to weed out groups that aren't ready yet to deal with Devil's Palace.
The next struggle is against Brinaranea, a powerful Ice Spider Matriarch from Jotunheim, or rather her animated corpse, controlled by the deceased Shenime. Do not be deceived by the slow wind-up, She's pretty tricky and capable of easily disrupting your group.
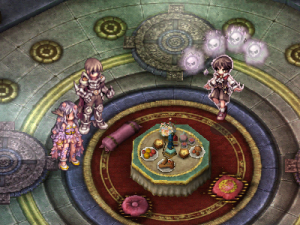
Right after, you will confront Muspelskoll, exceedingly powerful and excitable servant of Morroc that he brought straight from Muspelheim and rewarded in advance with the tasty soul of Ahat. Unlike Brinaranea, Muspelskoll is a straightforward and deadly fighter that can end your group in one breath. Not everything is as simple as it seems though, Muspelskoll will make use of the lava cauldrons to switch places and recover large amount of health from time to time. This can be prevented by tossing Millenial Ice Crystals into them, which will freeze the cauldrons for a moderate amount of time. You can loot the crystals from Brinaranea's map and their amount is limited, if you group lacks damage output, you may very well not me able to get past this point.
After both beasts are dealt with, you will be able to confront Morroc himself. Before entering the final room, Guardian Nidhoggur may assist the group by creating an avatar of herself (mercenary) for the party's leader, keeping it buffed and alive will make the final fight easier.
At first, you will confront Reincarnated Morroc in his infant form, while not overly deadly, he will make the group take constant damage, and upon reaching low HP, will teleport away and become immune, healing large amounts of HP constantly, you must quickly kill the two aspects he had summoned to stop this.
Upon defeating the first form, Morroc will finally get serious, growing up and transforming into Desperate Morroc. In this form, he will dish out large amounts of single-target and area damage as well as speeding up the attack speed as his HP dwindles.
In both forms, Morroc will use increasingly more dangerous spells as you tear down his HP, if your group can't damage him fast enough, you may fail miserably.
Background and Lore
Related Quests and Content
- Dimensional Travel
- Bios Island
- Mors' Cave
- The End of Morroc
- Orb's Magic Recovery
- Corrupted Gatekeepers
- Frost Spider
- Flame Wolf
- The Mastermind
- The Demon King's Downfall
Monsters
| Name | Level | HP | Size | Race | Elements | Base EXP | Job EXP |
|---|
Rewards
Normal Rewards
| Name | Drops From |
|---|
MVP Rewards
| Name | Drops From |
|---|