Difference between revisions of "MVP"
Terpsichore (Talk | contribs) |
Terpsichore (Talk | contribs) |
||
| (18 intermediate revisions by 4 users not shown) | |||
| Line 1: | Line 1: | ||
== Overview == | == Overview == | ||
| − | |||
| − | |||
| − | While individual players may be able to defeat MVPs by themselves, it is significantly easier to fight MVPs in groups. Because of the difficulty in defeating MVPs, such monsters give high amounts of [[experience]]. MVPs will also drop exclusive "MVP loot" which is different from and additional to the normal loot from the monster. The MVP loot is added directly into the inventory of the player who achieved the MVP status during the fight. | + | MVP stands for "Most Valuable Player", a definition not exclusive to Ragnarok Online. However, in Ragnarok Online, this term applies to [[monsters]], not players. A MVP is a monster that has both [[Boss Protocol]] and MVP Protocol.<br> |
| + | They are much stronger than normal monsters and often times require a party to successfully take them down. MVPs appear on a wide range of maps, typically inside [[:Category:Dungeons|Dungeons]] and [[:Category:Instances|Instances]] but can also be found in fields.<br> | ||
| + | Most often, they spawn at certain times that vary from MVP to MVP; some may spawn once every hour, some may respawn only when the server restarts, some even spawn only when a GM decides to spawn it.<br> | ||
| + | The spawn time is determined by the last time that a MVP of that kind was killed. In addition to their own [[stats]] and [[skills]], MVPs often summon [[monsters]] that will fight with them as their minions, making them much harder to defeat.<br> | ||
| + | Depending on the MVP, the fight may consist of up to nine monsters, which could be the same kind of monster or different ones. | ||
| + | |||
| + | While individual players may be able to defeat MVPs by themselves, it is significantly easier to fight MVPs in groups. Because of the difficulty in defeating MVPs, such monsters give high amounts of [[experience]].<br> | ||
| + | MVPs will also drop exclusive "MVP loot" which is different from and additional to the normal loot from the monster. The MVP loot is added directly into the inventory of the player who achieved the MVP status during the fight.<br> | ||
MVPs are also [[Free for All|free-for-all]], which means that anyone can attack them, regardless of who found it first or who summoned it.<br /><br /> | MVPs are also [[Free for All|free-for-all]], which means that anyone can attack them, regardless of who found it first or who summoned it.<br /><br /> | ||
| Line 10: | Line 15: | ||
== Tomb == | == Tomb == | ||
| − | When killed, MVPs will leave a tomb at the spot in which they were killed. Speaking to the tomb gives information on the MVP's time of death (PST) and the player who received the MVP award for killing it. The tomb will not give information on the MVP's next spawn location or spawn time. Any MVPs spawned by a player, such as Ktullanux, do not leave behind tombs. | + | When killed, MVPs will leave a tomb at the spot in which they were killed. Speaking to the tomb gives information on the MVP's time of death (PST) and the player who received the MVP award for killing it.<br> |
| + | The tomb will not give information on the MVP's next spawn location or spawn time. Any MVPs spawned by a player, such as Ktullanux, do not leave behind tombs. | ||
[[File:Tomb.png|link=|caption]] [[File:Tomb_Info.png|link=|caption]] | [[File:Tomb.png|link=|caption]] [[File:Tomb_Info.png|link=|caption]] | ||
| Line 17: | Line 23: | ||
== List of Normal MVPs == | == List of Normal MVPs == | ||
| − | Normal MVPs spawn at a set amount of time after the previous one was defeated plus a random amount of time, which is anywhere from 10 to 60 minutes. For example, if Amon Ra is defeated at 11:00, it would spawn again in between 12:00 and 12:10. If a MVP spawns in multiple places, the times are independent of one another and the respawn period may be different. Below is a list of all normal MVPs, where they are located, and the time that needs to elapse before it will respawn | + | |
| + | Normal MVPs spawn at a set amount of time after the previous one was defeated plus a random amount of time, which is anywhere from 10 to 60 minutes.<br> | ||
| + | For example, if Amon Ra is defeated at 11:00, it would spawn again in between 12:00 and 12:10.<br> | ||
| + | If a MVP spawns in multiple places, the times are independent of one another and the respawn period may be different.<br> | ||
| + | |||
| + | Below is a list of all normal MVPs, where they are located, and the time that needs to elapse before it will respawn<br> | ||
| + | Normal MVPs except for those from the Uber Difficulty category can be spawned through Abracadabra and Bloody Branches. | ||
{| class="mw-collapsible mw-collapsed wikitable" | {| class="mw-collapsible mw-collapsed wikitable" | ||
| Line 25: | Line 37: | ||
! Name !! Level !! Map !! Respawn Time | ! Name !! Level !! Map !! Respawn Time | ||
|- | |- | ||
| − | | [[image:doppleganger.gif|link=|caption]]<br>Doppelganger || 98 || gef_dun02 | + | | [[image:doppleganger.gif|link=|caption]]<br>{{Monster|id = 1046 Doppelganger}} || 98 || {{Map|id = gef_dun02 Geffen Dungeon F3}} || 2 hours |
|- | |- | ||
| − | | [[image:dracula.gif|link=|caption]]<br>Dracula || 98 || gef_dun01 | + | | [[image:dracula.gif|link=|caption]]<br>{{Monster|id = 1389 Dracula}} || 98 || {{Map|id = gef_dun01 Geffen Dungeon F2}} || 1 hour |
|- | |- | ||
| − | | [[image:drake.gif|link=|caption]]<br>Drake || 98 || treasure02 | + | | [[image:drake.gif|link=|caption]]<br>{{Monster|id = 1112 Drake}} || 98 || {{Map|id = treasure02 Sunken Ship F2}} || 2 hours |
|- | |- | ||
| − | | rowspan="2" | [[image:eddga.gif|link=|caption]]<br>Eddga || rowspan="2" | 98 || pay_fild10 | + | | rowspan="2" | [[image:eddga.gif|link=|caption]]<br>{{Monster|id = 1115 Eddga}} || rowspan="2" | 98 || {{Map|id = pay_fild10 Payon Forest 10}} || 2 hours |
|- | |- | ||
| − | | pay_fild11 | + | | {{Map|id = pay_fild11 Payon Forest 11}} || 2 hours |
|- | |- | ||
| − | | [[image:golden thief bug.gif|link=|caption]]<br>Golden Thief Bug || 98 || prt_sewb4 | + | | [[image:golden thief bug.gif|link=|caption]]<br>{{Monster|id = 1086 Golden Thief Bug}} || 98 || {{Map|id = prt_sewb4 Prontera Culvert F4}} || 1 hour |
|- | |- | ||
| − | | [[image:moonlight flower.gif|link=|caption]]<br>Moonlight Flower || 98 || pay_dun04 | + | | [[image:moonlight flower.gif|link=|caption]]<br>{{Monster|id = 1150 Moonlight Flower}} || 98 || {{Map|id = pay_dun04 Payon Cave F5}} || 1 hour |
|- | |- | ||
| − | | rowspan="2" | [[image:orc hero.gif|link=|caption]]<br>Orc Hero || rowspan="2" | 98 || gef_fild03 | + | | rowspan="2" | [[image:orc hero.gif|link=|caption]]<br>{{Monster|id = 1087 Orc Hero}} || rowspan="2" | 98 || {{Map|id = gef_fild03 Geffen Field 3}} || 1 hour |
|- | |- | ||
| − | | gef_fild14 | + | | {{Map|id = gef_fild14 Geffen Field 12}} || 1 hour |
|- | |- | ||
| − | | [[image:orc lord.gif|link=|caption]]<br>Orc Lord || 98 || gef_fild10 | + | | [[image:orc lord.gif|link=|caption]]<br>{{Monster|id = 1190 Orc Lord}} || 98 || {{Map|id = gef_fild10 Geffen Field 10}} || 2 hours |
|- | |- | ||
| − | | [[image:osiris.gif|link=|caption]]<br>Osiris || 98 || moc_pryd04 | + | | [[image:osiris.gif|link=|caption]]<br>{{Monster|id = 1038 Osiris}} || 98 || {{Map|id = moc_pryd04 Pyramid F4}} || 1 hour |
|- | |- | ||
| − | | [[image:phreeoni.gif|link=|caption]]<br>Phreeoni || 98 || moc_fild15 | + | | [[image:phreeoni.gif|link=|caption]]<br>{{Monster|id = 1159 Phreeoni}} || 98 || {{Map|id = moc_fild15 Sograt Desert 15}} || 2 hours |
|} | |} | ||
| Line 57: | Line 69: | ||
! Name !! Level !! Map !! Respawn Time | ! Name !! Level !! Map !! Respawn Time | ||
|- | |- | ||
| − | | [[Image:amon ra.gif|link=|caption]]<br>Amon Ra || 118 || moc_pryd06 | + | | [[Image:amon ra.gif|link=|caption]]<br>{{Monster|id = 1511 Amon Ra}} || 118 || {{Map|id = moc_pryd06 Pyramid B2}} || 1 hour |
|- | |- | ||
| − | | rowspan="5" | [[image:atroce.gif|link=|caption]]<br>Atroce || rowspan="5" | 123 || ra_fild02 | + | | rowspan="5" | [[image:atroce.gif|link=|caption]]<br>{{Monster|id = 1785 Atroce}} || rowspan="5" | 123 || {{Map|id = ra_fild02 Oz Gorge 1}} || 4 hours |
|- | |- | ||
| − | | ra_fild03 | + | | {{Map|id = ra_fild03 Ida Plane 1}} || 3 hours |
|- | |- | ||
| − | | ra_fild04 | + | | {{Map|id = ra_fild04 Aumdura Grass Land 1}} || 5 hours |
|- | |- | ||
| − | | ve_fild01 | + | | {{Map|id = ve_fild01 Veins Field 1}} || 5 hours |
|- | |- | ||
| − | | ve_fild02 | + | | {{Map|id = ve_fild02 Veins Field 2}} || 6 hours |
|- | |- | ||
| − | | [[image:bacsojin.gif|link=|caption]]<br> | + | | [[image:bacsojin.gif|link=|caption]]<br>{{Monster|id = 1630 Bacsosjin}} || 117 || {{Map|id = lou_dun03 Suei Long Gon}} || 2 hours |
|- | |- | ||
| − | | [[image:baphomet.gif|link=|caption]]<br>Baphomet || 111 || gl_cas02 | + | | [[image:baphomet.gif|link=|caption]]<br>{{Monster|id = 1039 Baphomet}} || 111 || {{Map|id = gl_cas02 Glast Heim Castle F2}} || 2 hours |
|- | |- | ||
| − | | [[image:boitata.gif|link=|caption]]<br>Boitata || 113 || bra_dun02 | + | | [[image:boitata.gif|link=|caption]]<br>{{Monster|id = 2068 Boitata}} || 113 || {{Map|id = bra_dun02 Beyond the Waterfall F2}} || 2 hours |
|- | |- | ||
| − | | [[image:dark lord.gif|link=|caption]]<br>Dark Lord || 116 || gl_chyard | + | | [[image:dark lord.gif|link=|caption]]<br>{{Monster|id = 1272 Dark Lord}} || 116 || {{Map|id = gl_chyard Glast Heim Chuchyard}} || 1 hour |
|- | |- | ||
| − | | [[image:evil snake lord.gif|link=|caption]]<br>Evil Snake Lord || 115 || gon_dun03 | + | | [[image:evil snake lord.gif|link=|caption]]<br>{{Monster|id = 1418 Evil Snake Lord}} || 115 || {{Map|id = gon_dun03 Arcadia}} || 2 hours |
|- | |- | ||
| − | | [[image:hatii.gif|link=|caption]]<br>Garm || 108 || xmas_fild01 | + | | [[image:hatii.gif|link=|caption]]<br>{{Monster|id = 1252 Garm}} || 108 || {{Map|id = xmas_fild01 Lutie Field}} || 2 hours |
|- | |- | ||
| − | | [[image:kiel d-01.gif|link=|caption]]<br>Kiel D-01 || 124 || kh_dun02 | + | | [[image:kiel d-01.gif|link=|caption]]<br>{{Monster|id = 1734 Kiel D-01}} || 124 || {{Map|id = kh_dun02 Robot Factory F2}} || 2 hours |
|- | |- | ||
| − | | [[image:stormy_knight.gif|link=|caption]]<br>Knight of Windstorm || 112 || xmas_dun02 | + | | [[image:stormy_knight.gif|link=|caption]]<br>{{Monster|id = 1251 Knight of Windstorm}} || 112 || {{Map|id = xmas_dun02 Toy Factory Monitoring Room}} || 1 hour |
|- | |- | ||
| − | | [[Image:lady_tanee.gif|link=|caption]]<br> | + | | [[Image:lady_tanee.gif|link=|caption]]<br>{{Monster|id = 1688 Lade Tanee}} || 109 || {{Map|id = ayo_dun02 Inside the Ancient Shrine}} || 7 hours |
|- | |- | ||
| − | | [[image:leak.gif|link=|caption]]<br>Leak || 114 || dew_dun01 | + | | [[image:leak.gif|link=|caption]]<br>{{Monster|id = 2156 Leak}} || 114 || {{Map|id = dew_dun01 Volcanic Island of Krakatoa}} || 2 hours |
|- | |- | ||
| − | | [[image:lord of the dead.gif|link=|caption]]<br>Lord of the Dead || 124 || niflheim | + | | [[image:lord of the dead.gif|link=|caption]]<br>{{Monster|id = 1373 Lord of the Dead}} || 124 || {{Map|id = niflheim Nifelheim, Realm of the Dead}} || 2 hours |
|- | |- | ||
| − | | [[image:maya.gif|link=|caption]]<br>Maya || 119 || anthell02 | + | | [[image:maya.gif|link=|caption]]<br>{{Monster|id = 1147 Maya}} || 119 || {{Map|id = anthell02 Ant Hell F2}} || 2 hours |
|- | |- | ||
| − | | [[image:mistress.gif|link=|caption]]<br>Mistress || 114 || mjolnir_04 | + | | [[image:mistress.gif|link=|caption]]<br>{{Monster|id = 1059 Mistress}} || 114 || {{Map|id = mjolnir_04 Mt. Mjolnir 4}} || 2 hours |
|- | |- | ||
| − | | [[image:pharaoh.gif|link=|caption]]<br>Pharaoh || 118 || in_sphinx5 | + | | [[image:pharaoh.gif|link=|caption]]<br>{{Monster|id = 1157 Pharaoh}} || 118 || {{Map|id = in_sphinx5 Sphinx F5}} || 1 hour |
|- | |- | ||
| − | | [[image:rsx-0806.gif|link=|caption]]<br>RSX 0806 || 120 || ein_dun02 | + | | [[image:rsx-0806.gif|link=|caption]]<br>{{Monster|id = 1623 RSX 0806}} || 120 || {{Map|id = ein_dun02 Einbroch's Mine F2}} || 2 hours |
|- | |- | ||
| − | | [[image:samurai specter.gif|link=|caption]]<br>Samurai Specter || 120 || ama_dun03 | + | | [[image:samurai specter.gif|link=|caption]]<br>{{Monster|id = 1492 Samurai Specter}} || 120 || {{Map|id = ama_dun03 Amatsu's Underground Shrine}} || 2 hours |
|- | |- | ||
| − | | [[image:tao gunka.gif|link=|caption]]<br>Tao Gunka || 120 || beach_dun | + | | [[image:tao gunka.gif|link=|caption]]<br>{{Monster|id = 1583 Tao Gunka}} || 120 || {{Map|id = beach_dun Karu, the West Cave}} || 5 hours |
|- | |- | ||
| − | | [[image:turtle general.gif|link=|caption]]<br>Turtle General || 120 || tur_dun04 | + | | [[image:turtle general.gif|link=|caption]]<br>{{Monster|id = 1312 Turtle General}} || 120 || {{Map|id = tur_dun04 Turtle Palace}} || 1 hour |
|- | |- | ||
| − | | [[image:woodie.gif|link=|caption]]<br>Woodie || 124 || um_dun02 | + | | [[image:woodie.gif|link=|caption]]<br>{{Monster|id = 3951 Woodie}} || 124 || {{Map|id = um_dun02 Passage to a Foreign World}} || 3 hours |
|- | |- | ||
| − | | [[image:zmey gorynych.gif|link=|caption]]<br>Zmey Gorynych || 117 || | + | | [[image:zmey gorynych.gif|link=|caption]]<br>{{Monster|id = 1885 Zmey Gorynych}} || 117 || {{Map|id = mosk_dun03 Dremuchiy Forest}} || 2 hours |
|} | |} | ||
| Line 117: | Line 129: | ||
! Name !! Level !! Map !! Respawn Time | ! Name !! Level !! Map !! Respawn Time | ||
|- | |- | ||
| − | | [[image:detardeurus.gif|link=|caption]]<br>Detardeurus || 155 || abyss_03 | + | | [[image:detardeurus.gif|link=|caption]]<br>{{Monster|id = 1719 Detardeurus}} || 155 || {{Map|id = abyss_03 Abyss Lake's Underground Cave F3}} || 3 hours |
|- | |- | ||
| − | | [[image:fallen bishop hibram.gif|link=|caption]]<br>Fallen Bishop Hibram || 158 || abbey02 | + | | [[image:fallen bishop hibram.gif|link=|caption]]<br>{{Monster|id = 1817 Fallen Bishop Hibram}} || 158 || {{Map|id = abbey02 Cursed Abbey F2}} || 2 hours |
|- | |- | ||
| − | | [[image:general egnigem.gif|link=|caption]]<br>General Egnigem || 141 || lhz_dun02 | + | | [[image:general egnigem.gif|link=|caption]]<br>{{Monster|id = 1658 General Egnigem}} || 141 || {{Map|id = lhz_dun02 Somatology Laboratory F2}} || 2 hours |
|- | |- | ||
| − | | [[image:gloom under night.gif|link=|caption]]<br>Gloom Under Night || 149 || ra_san05 | + | | [[image:gloom under night.gif|link=|caption]]<br>{{Monster|id = 1768 Gloom Under Night}} || 149 || {{Map|id = ra_san05 Freyja's Sacred Precinct F5}} || 5 hours |
|- | |- | ||
| − | | [[image:hardrock mammoth.gif|link=|caption]]<br>Hardrock Mammoth || 145 || man_fild03 | + | | [[image:hardrock mammoth.gif|link=|caption]]<br>{{Monster|id = 1990 Hardrock Mammoth}} || 145 || {{Map|id = man_fild03 Manuk Field 3}} || 4 hours |
|- | |- | ||
| − | | [[image:kraken tentacle.gif|link=|caption]]<br>Kraken's Tentacle (x5) || 158 || iz_dun05 | + | | [[image:kraken tentacle.gif|link=|caption]]<br>{{Monster|id = 2384 Kraken's Tentacle (x5)}} || 158 || {{Map|id = iz_dun05 Undersea City}} || 10 hours after Kraken's defeat |
|- | |- | ||
| − | | [[image:ktullanux.gif|link=|caption]]<br>Ktullanux || | + | | [[image:ktullanux.gif|link=|caption]]<br>{{Monster|id = 1779 Ktullanux}} || 149 || {{Map|id = ice_dun03 Ice Cave F3}} || 4 hours |
|- | |- | ||
| − | | rowspan="2" | [[image:kublin.gif|link=|caption]]<br>Kublin || rowspan="2" | 155 || arug_dun01 | + | | rowspan="2" | [[image:kublin.gif|link=|caption]]<br>{{Monster|id = 1980 Kublin}} || rowspan="2" | 155 || {{Map|id = arug_dun01 Arunafeltz Guild Dungeon}} || Beginning of every day |
|- | |- | ||
| − | | schg_dun01 | + | | {{Map|id = schg_dun01 Schwarzwald Guild Dungeon}} || Beginning of every day |
|- | |- | ||
| − | | [[image:memory of thanatos.gif|link=|caption]]<br>Memory of Thanatos || 161 || thana_boss | + | | [[image:memory of thanatos.gif|link=|caption]]<br>{{Monster|id = 1708 Memory of Thanatos}} || 161 || {{Map|id = thana_boss Thanatos Tower - Summit}} || 4 hours |
|- | |- | ||
| − | | [[image:scaraba queen.gif|link=|caption]]<br>Scaraba Queen || 150 || dic_dun02 | + | | [[image:scaraba queen.gif|link=|caption]]<br>{{Monster|id = 2087 Scaraba Queen}} || 150 || {{Map|id = dic_dun02 Scaraba Hall}} || 4 hours |
|- | |- | ||
| − | | [[image:tendrillion.gif|link=|caption]]<br>Tendrillion || 145 || spl_fild03 | + | | [[image:tendrillion.gif|link=|caption]]<br>{{Monster|id = 1991 Tendrillion}} || 145 || {{Map|id = spl_fild03 Splendide Field 3}} || 2 hours |
|- | |- | ||
| − | | [[image: | + | | [[image:IrefulMoonlightFlower.gif|link=|caption]]<br>{{Monster|id = 3758 Ireful Moonlight Flower}} || 142 || {{Map|id = pay_d03_i Illusion of Moonlight}} || 6 hours |
| + | |- | ||
| + | | [[image:AwakenedKtullanux.gif|link=|caption]]<br>{{Monster|id = 3796 Awakened Ktullanux}} || 152 || {{Map|id = ice_d03_i Illusion of Ice}} || 7 hours | ||
|} | |} | ||
| Line 151: | Line 165: | ||
! Name !! Level !! Map !! Respawn Time | ! Name !! Level !! Map !! Respawn Time | ||
|- | |- | ||
| − | | [[image:beelzebub.gif|link=|caption]]<br>Beelzebub || 167 || abbey03 | + | | [[image:beelzebub.gif|link=|caption]]<br>{{Monster|id = 1874 Beelzebub}} || 167 || {{Map|id = abbey03 Cursed Abbey F3}} || 12 hours |
|- | |- | ||
| − | | [[image:gold queen scaraba.gif|link=|caption]]<br>Golden Scaraba Queen || 169 || dic_dun03 | + | | [[image:gold queen scaraba.gif|link=|caption]]<br>{{Monster|id = 2165 Golden Scaraba Queen}} || 169 || {{Map|id = dic_dun03 Scaraba Hole}} || 8 hours |
|- | |- | ||
| − | | [[image:ifrit.gif|link=|caption]]<br>Ifrit || 166 || thor_v03 | + | | [[image:ifrit.gif|link=|caption]]<br>{{Monster|id = 1832 Ifrit}} || 166 || {{Map|id = thor_v03 Thor's Volcano F3}} || 11 hours |
|- | |- | ||
| − | | [[image:kraken.gif|link=|caption]]<br>Kraken || 168 || iz_dun05 | + | | [[image:kraken.gif|link=|caption]]<br>{{Monster|id = 2202 Kraken}} || 168 || {{Map|id = iz_dun05 [[Undersea City]]}} || Once all five Kraken's Tentacles are removed |
|- | |- | ||
| − | | [[image:nightmare amon ra.gif|link=|caption]]<br>Nightmare Amon Ra || 169 || moc_prydn2 | + | | [[image:nightmare amon ra.gif|link=|caption]]<br>{{Monster|id = 2362 Nightmare Amon Ra}} || 169 || {{Map|id = moc_prydn2 Nightmare Pyramid B2}} || 4 hours |
|- | |- | ||
| − | | [[image: | + | | [[image:3729.gif|link=|caption]]<br>{{Monster|id = 3729 Nightmare Dark Lord}} || 169 || {{Map|id = gl_chyard_ Nightmare Glast Heim Churchyard}} || 8 hours |
|- | |- | ||
| − | | [[image: | + | | [[image:2483.gif|link=|caption]]<br>{{Monster|id = 2483 Nightmare Baphomet}} || 175 || {{Map|id = gl_cas02_ Nightmare Glast Heim Castle}} || 12 hours |
|- | |- | ||
| − | | [[image:mrpd-0700.gif|link=|caption]]<br>MRPD-0700 || 175 || verus03 | + | | [[image:mrpd-0700.gif|link=|caption]]<br>{{Monster|id = 3933 MRPD-0700}} || 175 || {{Map|id = verus03 Verus Central Square}} || 12 hours |
|- | |- | ||
| − | | [[image:timeholder.gif|link=|caption]]<br>Timeholder || 175 || c_tower4_ | + | | [[image:timeholder.gif|link=|caption]]<br>{{Monster|id = 3074 Timeholder}} || 175 || {{Map|id = c_tower4_ Twisted Clock Tower 4F}} || 12 hours |
|- | |- | ||
| − | | [[image:valkyrie randgris.gif|link=|caption]]<br>Valkyrie Randgris || 161 || odin_tem03 | + | | [[image:valkyrie randgris.gif|link=|caption]]<br>{{Monster|id = 1751 Valkyrie Randgris}} || 161 || {{Map|id = odin_tem03 Odin's Temple F3}} || 8 hours |
| + | |- | ||
| + | | [[image:vesper.gif|link=|caption]]<br>{{Monster|id = 1685 Vesper}} || 168 || {{Map|id = jupe_core The Core of Juperos}} || 4 hours | ||
|- | |- | ||
| − | | [[image: | + | | [[image:wounded morroc.gif|link=|caption]]<br>{{Monster|id = 1917 Wounded Morroc}} || 171 || {{Map|id = moc_fild22 Dimensional Gorge}} || 12 hours |
|- | |- | ||
| − | | [[image: | + | | [[image:3757.gif|link=|caption]]<br>{{Monster|id = 3757 Enraged Dracula}} || 159 || {{Map|id = gef_d01_i Illusion of Vampire}} || 8 hours |
|- | |- | ||
| − | | [[image: | + | | [[image:3963.gif|link=|caption]]<br>{{Monster|id = 3963 Embla}} || 172|| {{Map|id = nyd_dun03 Svafnir's Hoard}} || 12 hours |
|} | |} | ||
| Line 181: | Line 197: | ||
== List of Instance MVPs == | == List of Instance MVPs == | ||
| + | |||
These MVPs are exclusive to their instances and do not spawn normally or through Abracadabra or Bloody Branches. | These MVPs are exclusive to their instances and do not spawn normally or through Abracadabra or Bloody Branches. | ||
| Line 189: | Line 206: | ||
! Name !! Level !! Instance | ! Name !! Level !! Instance | ||
|- | |- | ||
| − | | [[image:amdarais.gif|link=|caption]]<br>Amdarais || 160 || Old Glast Heim | + | | [[image:amdarais.gif|link=|caption]]<br>{{Monster|id = 2476 Amdarais}} || 160 || {{Map|id = 2@gl_k Old Glast Heim (Normal)}} |
| + | |- | ||
| + | | [[image:realized amdarais.gif|link=|caption]]<br>{{Monster|id = 3150 Amdarais}} || 180 || {{Map|id = 2@gl_kh Old Glast Heim (Hard)}} | ||
|- | |- | ||
| − | | [[image:ApostleAhat.gif|link=|caption]]<br>Apostle Ahat || 165 || [[Devil's Palace]] | + | | [[image:ApostleAhat.gif|link=|caption]]<br>{{Monster|id = 3105 Apostle Ahat}} || 165 || {{Map|id = 1@eom [[Devil's Palace]]}} |
|- | |- | ||
| − | | [[image:ApostleShenime.gif|link=|caption]]<br>Apostle Shenime || 165 || [[Devil's Palace]] | + | | [[image:ApostleShenime.gif|link=|caption]]<br>{{Monster|id = 3106 Apostle Shenime}} || 165 || {{Map|id = 1@eom [[Devil's Palace]]}} |
|- | |- | ||
| − | | [[image:bakonawa.gif|link=|caption]]<br>Bakonawa || 166 || Bakonawa's Lake | + | | [[image:bakonawa.gif|link=|caption]]<br>{{Monster|id = 2322 Bakonawa}} || 166 || {{Map|id = 1@ma_b Bakonawa's Lake}} |
|- | |- | ||
| − | | [[image:bangungot.gif|link=|caption]]<br>Bangungot || 124 || Bangungot's Hospital | + | | [[image:bangungot.gif|link=|caption]]<br>{{Monster|id = 2317 Bangungot}} || 124 || {{Map|id = 1@ma_h Bangungot's Hospital}} |
|- | |- | ||
| − | | [[image:Brinaranea.gif|link=|caption]]<br>Brinaranea || 170 || [[Devil's Palace]] | + | | [[image:Brinaranea.gif|link=|caption]]<br>{{Monster|id = 3091 Brinaranea}} || 170 || {{Map|id = 1@eom [[Devil's Palace]]}} |
|- | |- | ||
| − | | [[image:buwaya.gif|link=|caption]]<br>Buwaya || 161 || Buwaya's Cave | + | | [[image:buwaya.gif|link=|caption]]<br>{{Monster|id = 2319 Buwaya}} || 161 || {{Map|id = 1@ma_c Buwaya's Cave}} |
|- | |- | ||
| − | | [[image:coelacanth.gif|link=|caption]]<br>Coelacanth || 120 || Malangdo Culvert | + | | [[image:coelacanth.gif|link=|caption]]<br>{{Monster|id = 2186 Coelacanth}} || 120 || {{Map|id = 1@pump Malangdo Culvert (Normal)}} |
|- | |- | ||
| − | | [[image:dark coelacanth.gif|link=|caption]]<br>Dark Coelacanth || 124 || Malangdo Culvert (Normal) | + | | [[image:dark coelacanth.gif|link=|caption]]<br>{{Monster|id = 2187 Dark Coelacanth}} || 124 || {{Map|id = 1@pump Malangdo Culvert (Normal)}} |
|- | |- | ||
| − | | [[image:depraved orc hero.gif|link=|caption]]<br>Depraved Orc Hero || 80 || Orc's Memory | + | | [[image:depraved orc hero.gif|link=|caption]]<br>{{Monster|id = 2094 Depraved Orc Hero}} || 80 || {{Map|id = 1@orcs Orc's Memory}} |
|- | |- | ||
| − | | [[image:DesperateMorroc.gif|link=|caption]]<br>Desperate Morroc || 175 || [[Devil's Palace]] | + | | [[image:DesperateMorroc.gif|link=|caption]]<br>{{Monster|id = 3097 Desperate Morroc}} || 175 || {{Map|id = 1@eom [[Devil's Palace]]}} |
|- | |- | ||
| − | | [[image:Ferlock.gif|link=|caption]]<br>Enraged Captain Ferlock || 145 || [[Airship's Assault]] | + | | [[image:Ferlock.gif|link=|caption]]<br>{{Monster|id = 3181 Enraged Captain Ferlock}} || 145 || {{Map|id = 1@air1 [[Airship's Assault]]}} |
|- | |- | ||
| − | | [[image:entweihen crothen.gif|link=|caption]]<br>Entweihen Crothen || 168 || Endless Tower | + | | [[image:entweihen crothen.gif|link=|caption]]<br>{{Monster|id = 1957 Entweihen Crothen}} || 168 || {{Map|id = 5@tower Endless Tower}} |
|- | |- | ||
| − | | [[image:ferocious coelacanth.gif|link=|caption]]<br>Ferocious Coelacanth || 165 || Malangdo Culvert (Hard) | + | | [[image:ferocious coelacanth.gif|link=|caption]]<br>{{Monster|id = 2190 Ferocious Coelacanth}} || 165 || {{Map|id = 2@pump Malangdo Culvert (Hard)}} |
|- | |- | ||
| − | | [[image:giant octopus.gif|link=|caption]]<br>Giant Octopus || 112 || Octopus Cave | + | | [[image:giant octopus.gif|link=|caption]]<br>{{Monster|id = 2194 Giant Octopus}} || 112 || {{Map|id = 1@cash Octopus Cave}} |
|- | |- | ||
| − | | [[image:grand_pere.gif|link=|caption]]<br>Grand Pere || 155 || [[Jitterbug's Nightmare]] | + | | [[image:grand_pere.gif|link=|caption]]<br>{{Monster|id = 3073 Grand Pere}} || 155 || {{Map|id = 1@jtb [[Jitterbug's Nightmare]]}} |
|- | |- | ||
| − | | [[image:great demon baphomet.gif|link=|caption]]<br>Great Demon Baphomet || 168 || Sealed Shrine | + | | [[image:great demon baphomet.gif|link=|caption]]<br>{{Monster|id = 1929 Great Demon Baphomet}} || 168 || {{Map|id = 2@cata Sealed Shrine}} |
|- | |- | ||
| − | | [[image:GrimReaperAnkou.gif|link=|caption]]<br>Grim Reaper Ankou || 160 || [[Bios Island]] | + | | [[image:GrimReaperAnkou.gif|link=|caption]]<br>{{Monster|id = 3029 Grim Reaper Ankou}} || 160 || {{Map|id = 1@dth3 [[Bios Island]]}} |
|- | |- | ||
| − | | [[image:infinite eddga.gif|link=|caption]]<br>Infinite Eddga || 120 || [[Infinite Space]] | + | | [[image:infinite eddga.gif|link=|caption]]<br>{{Monster|id = 3426 Infinite Eddga}} || 120 || {{Map|id = 1@infi [[Infinite Space]]}} |
|- | |- | ||
| − | | [[image:infinite orc hero.gif|link=|caption]]<br>Infinite Orc Hero || 120 || [[Infinite Space]] | + | | [[image:infinite orc hero.gif|link=|caption]]<br>{{Monster|id = 3429 Infinite Orc Hero}} || 120 || {{Map|id = 1@infi [[Infinite Space]]}} |
|- | |- | ||
| − | | [[image:infinite osiris.gif|link=|caption]]<br>Infinite Osiris || 120 || [[Infinite Space]] | + | | [[image:infinite osiris.gif|link=|caption]]<br>{{Monster|id = 3427 Infinite Osiris}} || 120 || {{Map|id = 1@infi [[Infinite Space]]}} |
|- | |- | ||
| − | | [[image:infinite phreeoni.gif|link=|caption]]<br>Infinite Phreeoni || 120 || [[Infinite Space]] | + | | [[image:infinite phreeoni.gif|link=|caption]]<br>{{Monster|id = 3428 Infinite Phreeoni}} || 120 || {{Map|id = 1@infi [[Infinite Space]]}} |
|- | |- | ||
| − | | [[image:infinite tao gunka.gif|link=|caption]]<br>Infinite Tao Gunka || 140 || [[Infinite Space]] | + | | [[image:infinite tao gunka.gif|link=|caption]]<br>{{Monster|id = 3430 Infinite Tao Gunka}} || 140 || {{Map|id = 1@infi [[Infinite Space]]}} |
|- | |- | ||
| − | | [[image: | + | | [[image:ktullanux.gif|link=|caption]]<br>{{Monster|id = 3526 Reflection of Ktullanux}} || 160 || {{Map|id = [[Crescent in the Noon]] (Normal)}} |
|- | |- | ||
| − | | [[image: | + | | [[image:ktullanux.gif|link=|caption]]<br>{{Monster|id = 3579 Reflection of Ktullanux}} || 171 || {{Map|id = [[Crescent in the Noon]] (Hard)}} |
|- | |- | ||
| − | | [[image: | + | | [[image:lord doyen irene.gif|link=|caption]]<br>{{Monster|id = 2542 Lord Doyen Irene}} || 119 || {{Map|id = [[Memories of Sarah]]}} |
|- | |- | ||
| − | | [[image: | + | | [[image:Loomin.gif|link=|caption]]<br>{{Monster|id = 3516 Loomin}} || 128 || {{Map|id = 1@pop3 [[Crescent in the Noon]] (Easy)}} |
|- | |- | ||
| − | | [[image: | + | | [[image:Loomin.gif|link=|caption]]<br>{{Monster|id = 3524 Loomin}} || 159 || {{Map|id = 1@pop3 [[Crescent in the Noon]] (Normal)}} |
|- | |- | ||
| − | | [[image: | + | | [[image:Loomin.gif|link=|caption]]<br>{{Monster|id = 3577 Loomin}} || 170 || {{Map|id = 1@pop3 [[Crescent in the Noon]] (Hard)}} |
|- | |- | ||
| − | | [[image: | + | | [[image:lost dragon.gif|link=|caption]]<br>{{Monster|id = 2131 Lost Dragon}} || 145 || {{Map|id = 1@mist Misty Forest Maze}} |
|- | |- | ||
| − | | [[image: | + | | [[image:Muspelskoll.gif|link=|caption]]<br>{{Monster|id = 3092 Muspelskoll}} || 170 || {{Map|id = 1@eom [[Devil's Palace]]}} |
|- | |- | ||
| − | | [[image: | + | | [[image:mutant coelacanth.gif|link=|caption]]<br>{{Monster|id = 2189 Mutant Coelacanth}} || 165 || {{Map|id = 2@pump Malangdo Culvert (Hard)}} |
|- | |- | ||
| − | | [[image: | + | | [[image:naght sieger.gif|link=|caption]]<br>{{Monster|id = 1956 Naght Sieger}} || 169 || {{Map|id = 6@tower Endless Tower }} |
|- | |- | ||
| − | | [[image: | + | | [[image:NecromancerMors.gif|link=|caption]]<br>{{Monster|id = 3000 Necromancer Mors}} || 160 || {{Map|id = 1@rev [[Mors' Cave]]}} |
|- | |- | ||
| − | | [[image: | + | | [[image:nidhoggur shadow.gif|link=|caption]]<br>{{Monster|id = 2022 Nidhoggur's Shadow}} || 167 || {{Map|id = 2@nyd Nidhoggur's Nest}} |
|- | |- | ||
| − | | [[image:weird coelacanth.gif|link=|caption]]<br>Weird Coelacanth || 124 || Malangdo Culvert (Normal) | + | | [[image:ReincarnatedMorroc.gif|link=|caption]]<br>{{Monster|id = 3096 Reincarnated Morroc}} || 175 || {{Map|id = 1@eom [[Devil's Palace]]}} |
| + | |- | ||
| + | | [[image:root of corruption.gif|link=|caption]]<br>{{Monster|id = 2475 Root of Corruption}} || 159 || {{Map|id = 1@gl_k Old Glast Heim (Normal)}} | ||
| + | |- | ||
| + | | [[image:realized root of corruption.gif|link=|caption]]<br>{{Monster|id = 3151 Root of Corruption}} || 179 || {{Map|id = 1@gl_kh Old Glast Heim (Hard)}} | ||
| + | |- | ||
| + | | [[image:Pope_Casual.gif|link=|caption]]<br>{{Monster|id = 3580 The Pope (Waning Moon)}} || 172 || {{Map|id = 1@pop3 [[Crescent in the Noon]] (Hard)}} | ||
| + | |- | ||
| + | | [[image:Pope_Normal.gif|link=|caption]]<br>{{Monster|id = 3581 The Pope (Waxing Moon)}} || 172 || {{Map|id = 1@pop3 [[Crescent in the Noon]] (Hard)}} | ||
| + | |- | ||
| + | | [[image:WarlockMors.gif|link=|caption]]<br>{{Monster|id = 2999 Warlock Mors}} || 160 || {{Map|id = 1@rev [[Mors' Cave]]}} | ||
| + | |- | ||
| + | | [[image:weird coelacanth.gif|link=|caption]]<br>{{Monster|id = 2188 Weird Coelacanth}} || 124 || {{Map|id = 1@pump Malangdo Culvert (Normal)}} | ||
|} | |} | ||
| − | == Somatology Laboratory Level | + | == Somatology Laboratory Level F3 MVPs == |
| − | + | ||
| − | + | ||
| − | + | ||
| − | + | ||
| − | + | ||
| − | + | ||
| − | + | ||
| + | One of the following MVPs (chosen randomly) will spawn between 100 to 130 minutes after the previous MVP is defeated at {{Map|id = lhz_dun03 Somatology Laboratory F3}}. | ||
| + | Any of those bosses may also be randomly spawned inside of the {{Map|id = 1@lhz Wolfchev's Laboratory}} Instanced Dungeon. | ||
| − | == Somatology Laboratory Level | + | {| class="mw-collapsible mw-collapsed wikitable" |
| − | + | |- | |
| + | ! colspan="2" | Somatology Laboratory F3 | ||
| + | |- | ||
| + | ! Name !! Level | ||
| + | |- | ||
| + | | [[image:assassin cross eremes.gif|link=|caption]]<br>{{Monster|id = 1647 Assassin Cross Eremes}} || 175 | ||
| + | |- | ||
| + | | [[image:high priest margaretha.gif|link=|caption]]<br>{{Monster|id = 1649 High Priest Margaretha}} || 175 | ||
| + | |- | ||
| + | | [[image:high wizard kathryne.gif|link=|caption]]<br>{{Monster|id = 1651 High Wizard Kathryne}} || 175 | ||
| + | |- | ||
| + | | [[image:lord knight seyren.gif|link=|caption]]<br>{{Monster|id = 1646 Lord Knight Seyren}} || 175 | ||
| + | |- | ||
| + | | [[image:whitesmith howard.gif|link=|caption]]<br>{{Monster|id = 1648 Whitesmith Howard}} || 175 | ||
| + | |- | ||
| + | | [[image:sniper cecil.gif|link=|caption]]<br>{{Monster|id = 1650 Sniper Cecil}} || 175 | ||
| + | |} | ||
| − | + | ||
| − | + | == Somatology Laboratory Level F4 MVPs == | |
| − | + | ||
| − | + | One of the following MVPs (chosen randomly) will spawn between 100 to 130 minutes after the previous MVP is defeated at {{Map|id = lhz_dun04 Somatology Laboratory F4}}. | |
| − | + | Any of those bosses may also be randomly spawned inside of the {{Map|id = 1@lhz Wolfchev's Laboratory}} Instanced Dungeon. | |
| − | + | ||
| − | + | {| class="mw-collapsible mw-collapsed wikitable" | |
| + | |- | ||
| + | ! colspan="2" | Somatology Laboratory F3 | ||
| + | |- | ||
| + | ! Name !! Level | ||
| + | |- | ||
| + | | [[image:paladin randel.gif|link=|caption]]<br>{{Monster|id = 2235 Paladin Randel}} || 175 | ||
| + | |- | ||
| + | | [[image:creator flamel.gif|link=|caption]]<br>{{Monster|id = 2236 Creator Flamel}} || 175 | ||
| + | |- | ||
| + | | [[image:champion chen.gif|link=|caption]]<br>{{Monster|id = 2238 Champion Chen}} || 175 | ||
| + | |- | ||
| + | | [[image:stalker gertie.gif|link=|caption]]<br>{{Monster|id = 2239 Stalker Gertie}} || 175 | ||
| + | |- | ||
| + | | [[image:professor celia.gif|link=|caption]]<br>{{Monster|id = 2237 Professor Celia}} || 175 | ||
| + | |- | ||
| + | | [[image:clown alphoccio.gif|link=|caption]]<br>{{Monster|id = 2240 Clown Alphoccio}} || 175 | ||
| + | |- | ||
| + | | [[image:gypsy trentini.gif|link=|caption]]<br>{{Monster|id = 2241 Gypsy Trentini}} || 175 | ||
| + | |} | ||
== Special MVP Monsters == | == Special MVP Monsters == | ||
| − | The following MVPs have special spawn conditions that do not follow the timed spawn model. | + | |
| − | + | The following MVPs have special spawn conditions that do not follow the timed spawn model.<br> | |
| − | + | ||
| − | + | {{Monster|id = 2538 King Poring}} is an event boss and only spawns when GMs decide to spawn it. This MVP is classified as SSS difficulty. | |
| − | + | ||
| − | + | {{Monster|id = 1779 Ktullanux}} is spawned by using 4 {{Item|id = 7574 Freezing Snow Powder}} (obtained via the Ice Necklace Quest or by helping Oisin in Rachel),<br> | |
| + | or 4 {{Item|id = 7562 Ice Scales}} (obtained by defeating Ktullanux previously) to put out the four sacred fires in {{Map|id = ice_dun03 (Ice Cave F3)}}.<br> | ||
| + | Once defeated, Ktullanux cannot be summoned again for another 2 hours.<br> | ||
| + | |||
| + | {{Monster|id = 2202 Kraken}} requires you to kill the 5 {{Monster|id = 2384 Kraken's Tentacle}} on the same map in order to make the boss spawn.<br> | ||
| + | Once Kraken has been defeated and 10 hours have passed, the Tentacles will respawn.<br> | ||
| + | |||
| + | {{Monster|id = 1373 Lord of the Dead}} does not leave a Tombstone. You can tell that that the MVP is alive by the presence of {{Monster|id = 1505 Loli Ruri}} monsters on the map. | ||
| + | |||
| + | {{Monster|id = 1708 Memory of Thanatos}} does not spawn normally. One must climb the tower and complete the quests in order to summon it.<br> | ||
| + | Once successfully summoned and defeated, it can't be summoned again for 4 hours. | ||
== Summoning MVPs == | == Summoning MVPs == | ||
| − | Some MVPs can be summoned, typically through using a Bloody Branch or through | + | |
| + | Some MVPs can be summoned, typically through using a Bloody Branch or through Abracadabra.<br> | ||
| + | The MVPs summoned with these methods are not part of the [[Free for All]] rule and are tied to the party or person that summoned them, unless they are abandoned.<br> | ||
| + | |||
| + | The following MVPs can be summoned: | ||
| + | |||
* Osiris | * Osiris | ||
* Baphomet | * Baphomet | ||
| Line 336: | Line 412: | ||
* Fallen Bishop Hibram | * Fallen Bishop Hibram | ||
* Woodie | * Woodie | ||
| + | * Memory of Thanatos | ||
| + | |||
== Related Items == | == Related Items == | ||
| + | |||
=== Headgears === | === Headgears === | ||
| − | * [ | + | * {{item|id = 18574 Lord of the Dead's Helm [1]}} |
| − | * Anubis Hat | + | * {{item|id = 5363 Abysmal Knight's Helm [1]}} |
| − | * Odin's Mask | + | * {{item|id = 5490 Anubis Hat}} |
| + | * {{item|id = 5483 Odin's Mask}} | ||
| + | * {{item|id = 20489 Papal Tiara [1]}} | ||
| + | === Shields === | ||
| + | * {{item|id = 2169 Kalasag}} | ||
| + | * {{item|id = 2170 Kalasag (Bayani)}} | ||
| + | |||
| + | === Armors === | ||
| + | * {{item|id = 15051 Bakonawa's Scale Armor}} | ||
| + | * {{item|id = 15052 Bakonawa's Scale Armor (Bayani)}} | ||
| + | |||
| + | === Weapons === | ||
| + | * {{item|id = 1140 Byeollungum}} | ||
| + | * {{item|id = 1470 Brionac}} | ||
| + | * {{item|id = 1474 Gae Bolg}} | ||
=== Cards === | === Cards === | ||
| − | * Abysmal Knight (Weapon) | + | * {{item|id = 4140 Abysmal Knight Card (Weapon)}} |
| − | * Alice (Shield) | + | * {{item|id = 4253 Alice Card (Shield)}} |
| + | * {{item|id = 4374 Vesper Card (Headgear)}} | ||
| + | |||
| + | |||
{{Navbox_Monster}} | {{Navbox_Monster}} | ||
[[Category: General Information]] | [[Category: General Information]] | ||
Latest revision as of 22:54, 21 September 2023
Contents
Overview
MVP stands for "Most Valuable Player", a definition not exclusive to Ragnarok Online. However, in Ragnarok Online, this term applies to monsters, not players. A MVP is a monster that has both Boss Protocol and MVP Protocol.
They are much stronger than normal monsters and often times require a party to successfully take them down. MVPs appear on a wide range of maps, typically inside Dungeons and Instances but can also be found in fields.
Most often, they spawn at certain times that vary from MVP to MVP; some may spawn once every hour, some may respawn only when the server restarts, some even spawn only when a GM decides to spawn it.
The spawn time is determined by the last time that a MVP of that kind was killed. In addition to their own stats and skills, MVPs often summon monsters that will fight with them as their minions, making them much harder to defeat.
Depending on the MVP, the fight may consist of up to nine monsters, which could be the same kind of monster or different ones.
While individual players may be able to defeat MVPs by themselves, it is significantly easier to fight MVPs in groups. Because of the difficulty in defeating MVPs, such monsters give high amounts of experience.
MVPs will also drop exclusive "MVP loot" which is different from and additional to the normal loot from the monster. The MVP loot is added directly into the inventory of the player who achieved the MVP status during the fight.
MVPs are also free-for-all, which means that anyone can attack them, regardless of who found it first or who summoned it.
Tomb
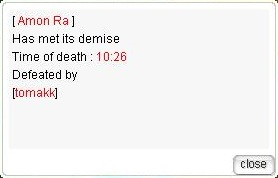
When killed, MVPs will leave a tomb at the spot in which they were killed. Speaking to the tomb gives information on the MVP's time of death (PST) and the player who received the MVP award for killing it.
The tomb will not give information on the MVP's next spawn location or spawn time. Any MVPs spawned by a player, such as Ktullanux, do not leave behind tombs.

List of Normal MVPs
Normal MVPs spawn at a set amount of time after the previous one was defeated plus a random amount of time, which is anywhere from 10 to 60 minutes.
For example, if Amon Ra is defeated at 11:00, it would spawn again in between 12:00 and 12:10.
If a MVP spawns in multiple places, the times are independent of one another and the respawn period may be different.
Below is a list of all normal MVPs, where they are located, and the time that needs to elapse before it will respawn
Normal MVPs except for those from the Uber Difficulty category can be spawned through Abracadabra and Bloody Branches.
| Low Difficulty | |||
|---|---|---|---|
| Name | Level | Map | Respawn Time |
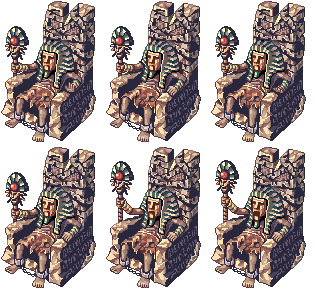
| Doppelganger |
98 | Geffen Dungeon F3 | 2 hours |
 Dracula |
98 | Geffen Dungeon F2 | 1 hour |
 Drake |
98 | Sunken Ship F2 | 2 hours |
 Eddga |
98 | Payon Forest 10 | 2 hours |
| Payon Forest 11 | 2 hours | ||
| Golden Thief Bug |
98 | Prontera Culvert F4 | 1 hour |
 Moonlight Flower |
98 | Payon Cave F5 | 1 hour |
 Orc Hero |
98 | Geffen Field 3 | 1 hour |
| Geffen Field 12 | 1 hour | ||
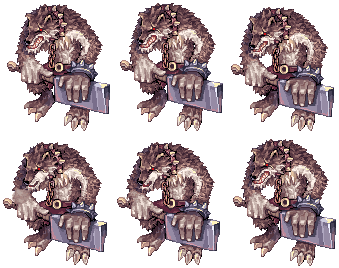
 Orc Lord |
98 | Geffen Field 10 | 2 hours |
 Osiris |
98 | Pyramid F4 | 1 hour |
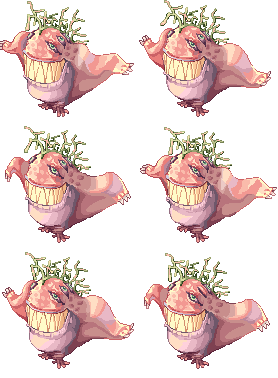 Phreeoni |
98 | Sograt Desert 15 | 2 hours |
| High Difficulty | |||
|---|---|---|---|
| Name | Level | Map | Respawn Time |
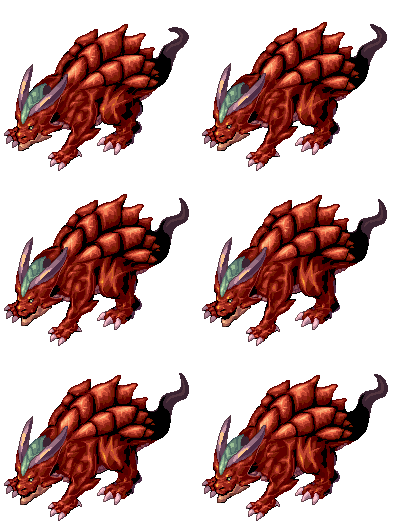 Detardeurus |
155 | Abyss Lake's Underground Cave F3 | 3 hours |
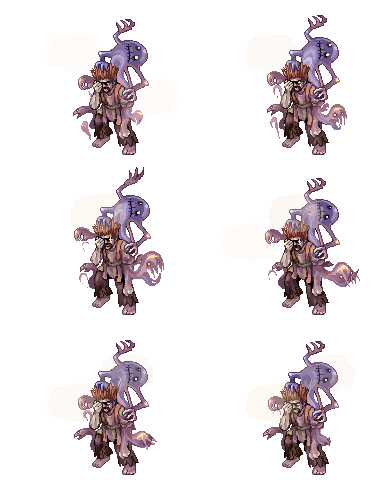 Fallen Bishop Hibram |
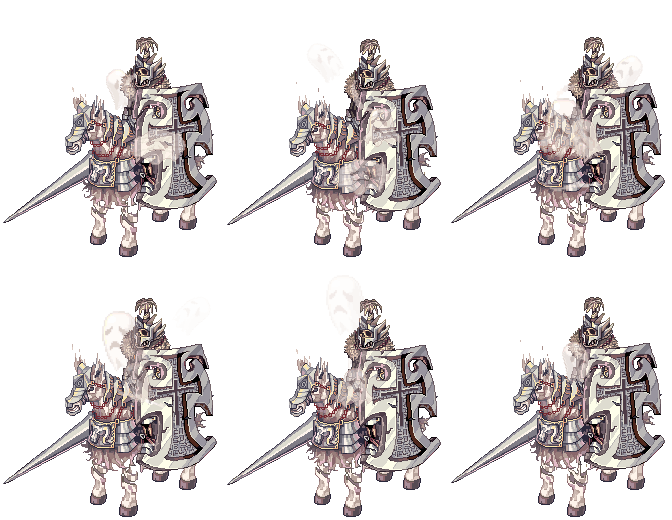
158 | Cursed Abbey F2 | 2 hours |
 General Egnigem |
141 | Somatology Laboratory F2 | 2 hours |
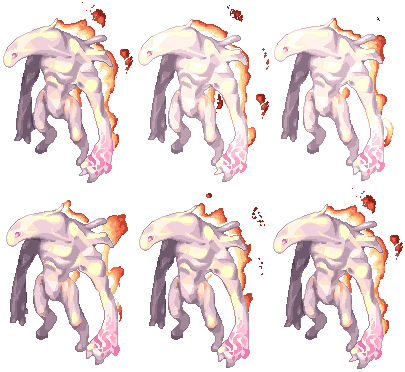 Gloom Under Night |
149 | Freyja's Sacred Precinct F5 | 5 hours |
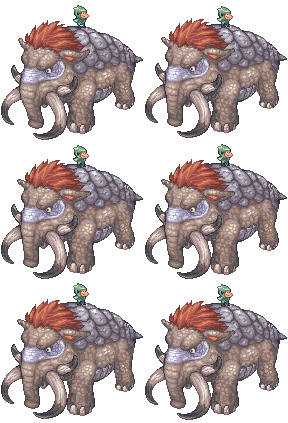 Hardrock Mammoth |
145 | Manuk Field 3 | 4 hours |
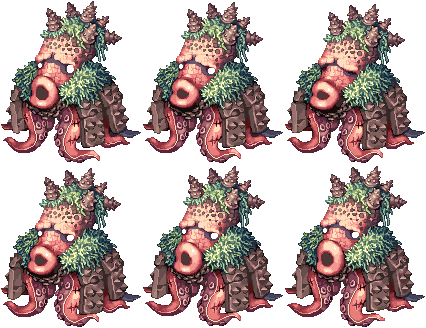
 Kraken's Tentacle (x5) |
158 | Undersea City | 10 hours after Kraken's defeat |
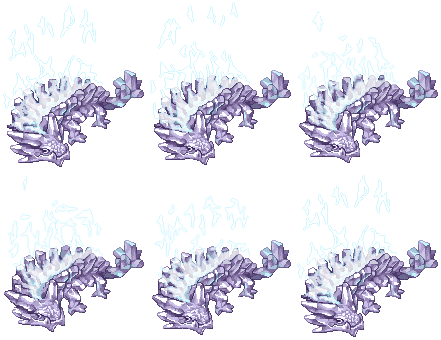 Ktullanux |
149 | Ice Cave F3 | 4 hours |
 Kublin |
155 | Arunafeltz Guild Dungeon | Beginning of every day |
| Schwarzwald Guild Dungeon | Beginning of every day | ||
 Memory of Thanatos |
161 | Thanatos Tower - Summit | 4 hours |
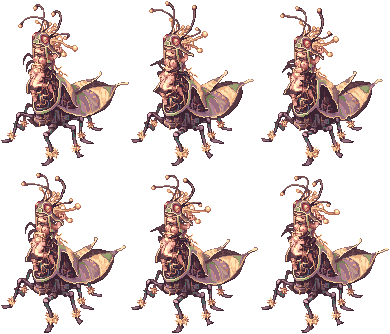
 Scaraba Queen |
150 | Scaraba Hall | 4 hours |
 Tendrillion |
145 | Splendide Field 3 | 2 hours |
 Ireful Moonlight Flower |
142 | Illusion of Moonlight | 6 hours |
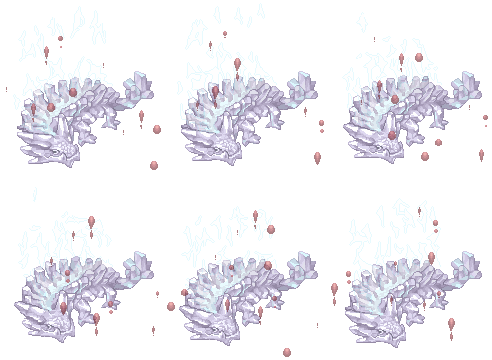 Awakened Ktullanux |
152 | Illusion of Ice | 7 hours |
| Uber Difficulty | |||
|---|---|---|---|
| Name | Level | Map | Respawn Time |
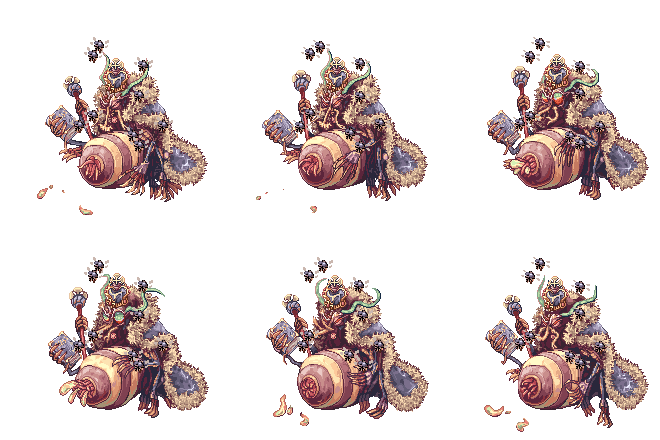 Beelzebub |
167 | Cursed Abbey F3 | 12 hours |
 Golden Scaraba Queen |
169 | Scaraba Hole | 8 hours |
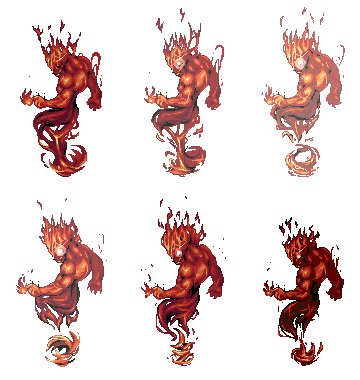 Ifrit |
166 | Thor's Volcano F3 | 11 hours |
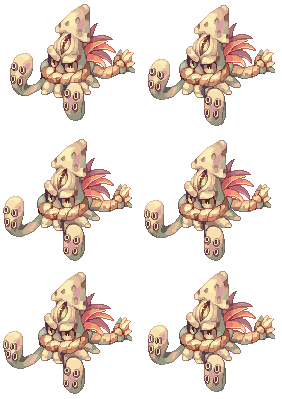 Kraken |
168 | Undersea City | Once all five Kraken's Tentacles are removed |
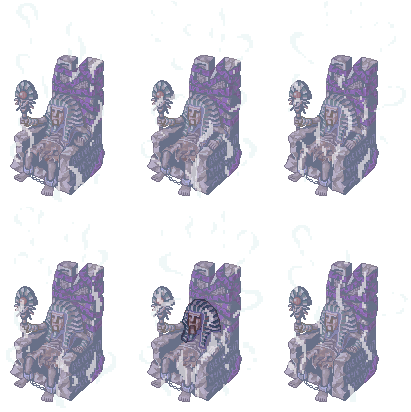 Nightmare Amon Ra |
169 | Nightmare Pyramid B2 | 4 hours |
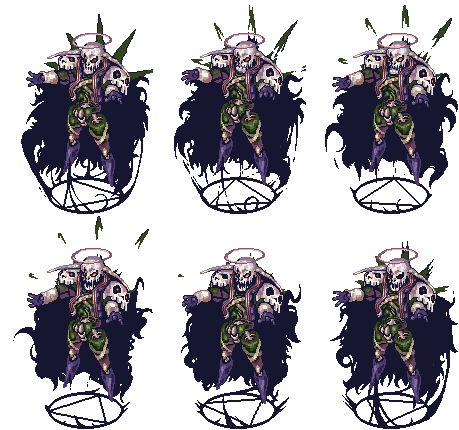
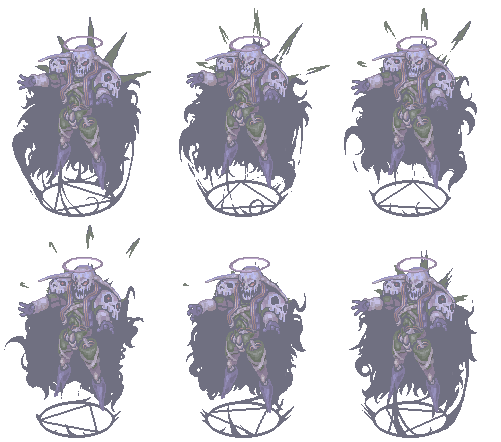 Nightmare Dark Lord |
169 | Nightmare Glast Heim Churchyard | 8 hours |
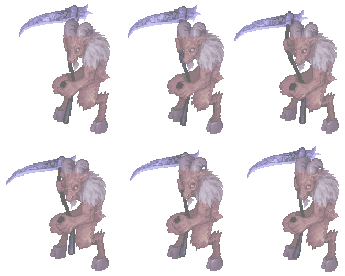 Nightmare Baphomet |
175 | Nightmare Glast Heim Castle | 12 hours |
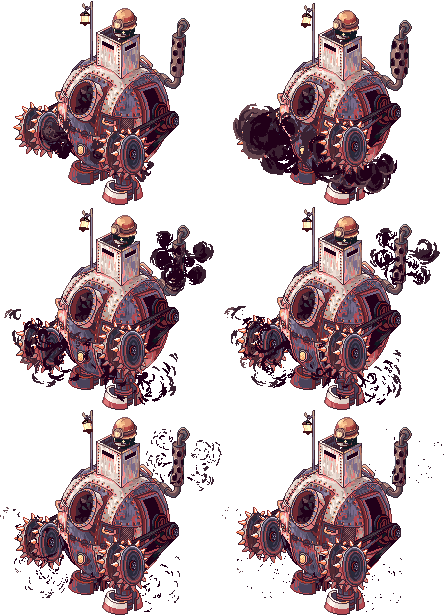
 MRPD-0700 |
175 | Verus Central Square | 12 hours |
 Timeholder |
175 | Twisted Clock Tower 4F | 12 hours |
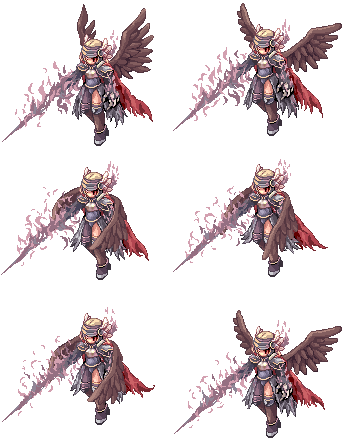 Valkyrie Randgris |
161 | Odin's Temple F3 | 8 hours |
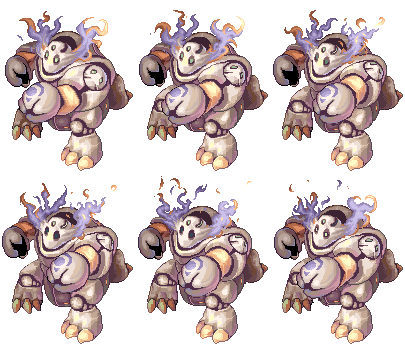 Vesper |
168 | The Core of Juperos | 4 hours |
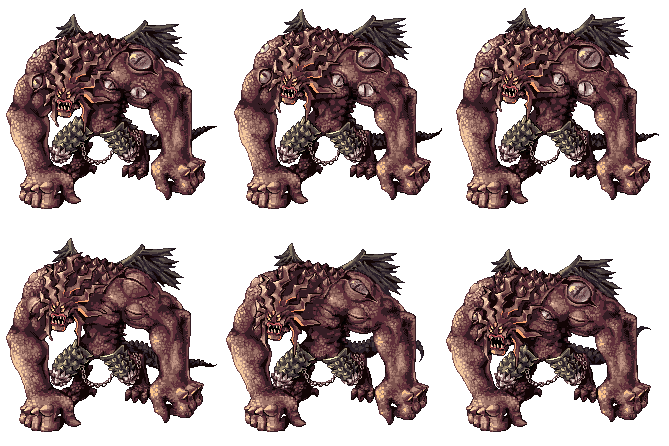 Wounded Morroc |
171 | Dimensional Gorge | 12 hours |
 Enraged Dracula |
159 | Illusion of Vampire | 8 hours |
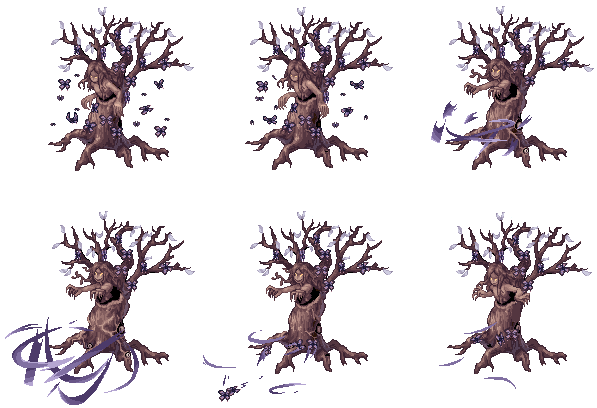 Embla |
172 | Svafnir's Hoard | 12 hours |
List of Instance MVPs
These MVPs are exclusive to their instances and do not spawn normally or through Abracadabra or Bloody Branches.
Somatology Laboratory Level F3 MVPs
One of the following MVPs (chosen randomly) will spawn between 100 to 130 minutes after the previous MVP is defeated at Somatology Laboratory F3. Any of those bosses may also be randomly spawned inside of the Wolfchev's Laboratory Instanced Dungeon.
| Somatology Laboratory F3 | |
|---|---|
| Name | Level |
 Assassin Cross Eremes |
175 |
 High Priest Margaretha |
175 |
 High Wizard Kathryne |
175 |
 Lord Knight Seyren |
175 |
 Whitesmith Howard |
175 |
 Sniper Cecil |
175 |
Somatology Laboratory Level F4 MVPs
One of the following MVPs (chosen randomly) will spawn between 100 to 130 minutes after the previous MVP is defeated at Somatology Laboratory F4. Any of those bosses may also be randomly spawned inside of the Wolfchev's Laboratory Instanced Dungeon.
| Somatology Laboratory F3 | |
|---|---|
| Name | Level |
 Paladin Randel |
175 |
 Creator Flamel |
175 |
 Champion Chen |
175 |
 Stalker Gertie |
175 |
 Professor Celia |
175 |
 Clown Alphoccio |
175 |
 Gypsy Trentini |
175 |
Special MVP Monsters
The following MVPs have special spawn conditions that do not follow the timed spawn model.
King Poring is an event boss and only spawns when GMs decide to spawn it. This MVP is classified as SSS difficulty.
Ktullanux is spawned by using 4 Freezing Snow Powder (obtained via the Ice Necklace Quest or by helping Oisin in Rachel),
or 4 Ice Scales (obtained by defeating Ktullanux previously) to put out the four sacred fires in (Ice Cave F3).
Once defeated, Ktullanux cannot be summoned again for another 2 hours.
Kraken requires you to kill the 5 Kraken's Tentacle on the same map in order to make the boss spawn.
Once Kraken has been defeated and 10 hours have passed, the Tentacles will respawn.
Lord of the Dead does not leave a Tombstone. You can tell that that the MVP is alive by the presence of Loli Ruri monsters on the map.
Memory of Thanatos does not spawn normally. One must climb the tower and complete the quests in order to summon it.
Once successfully summoned and defeated, it can't be summoned again for 4 hours.
Summoning MVPs
Some MVPs can be summoned, typically through using a Bloody Branch or through Abracadabra.
The MVPs summoned with these methods are not part of the Free for All rule and are tied to the party or person that summoned them, unless they are abandoned.
The following MVPs can be summoned:
- Osiris
- Baphomet
- Doppelganger
- Mistress
- Golden Thief Bug
- Orc Hero
- Drake
- Eddga
- Maya
- Moonlight Flower
- Pharaoh
- Phreeoni
- Orc Lord
- Knight of Windstorm
- Garm
- Dark Lord
- Turtle General
- Lord of the Dead
- Dracula
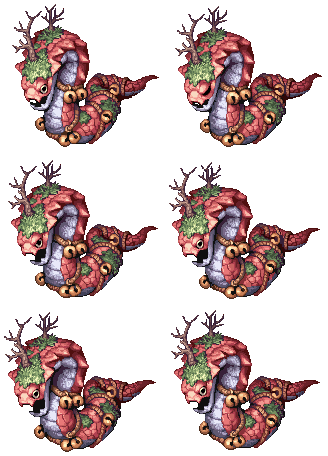
- Evil Snake Lord
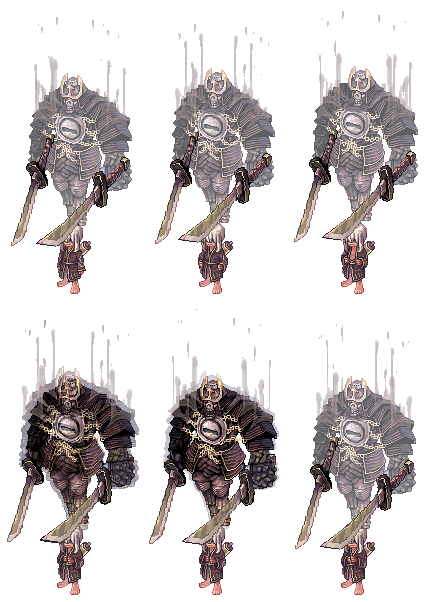
- Samurai Specter
- Lady Tanee
- Amon Ra (normal)
- Tao Gunka
- Zmey Gorynych
- RSX-0806
- Bacsojin
- Kiel D-01
- General Egnigem
- Atroce
- Leak
- Tendrillion
- Hardrock Mammoth
- Scaba Queen
- Gloom Under Night
- Ktullanux
- Detardeurus
- Fallen Bishop Hibram
- Woodie
- Memory of Thanatos
Related Items
Headgears
Shields
Armors
Weapons
Cards
| Monsters | ||
|---|---|---|
| Element | Earth • Fire • Ghost • Holy • Neutral • Poison • Shadow • Undead • Water • Wind | |
| Race | Angel • Brute • Demihuman • Demon • Dragon • Fish • Formless • Insect • Plant • Undead | |
| Monster Rules and Info | Boss Protocol • Kill Stealing • MVP (Free for All) • Size | |
